|
|

Joined:
October 2012
Posts: 1018
Location: Yokohama, Japan | Hope everybody at the OFC had a great summer. After returning from the States with my friends Nakao Elite NNS778-9, things got terribly hectic. I never had a chance to take the video to sample the sound of the incredibly restored instrument; and now, my friend is so enamored with his pratically brand new Mini-Mother restored Elite, he just can't get enough of her! I was just feeling a bit withdrawn, when I walked by a Celebrity CC247 in a used instrument store the other day. The CC247 was listed in "excellent" condition and priced at about 300 bucks (JPY)...not a bad price, but I had no intention of buying her, of course... I had to try her out anyway, and took her for a spin. The pre-amp wasn't working, and the neck was in need of a reset. Just as I was about to put her away, the store manager walks by; and so, I mentioned the "not so excellent" condition to him, and he says, "You can have her for a 180 bucks." Thinking he was joking, I laughed and said, "I'll give you 150" to which he replied, "It's yours!" 
This is in the "GS" (Green Stain) color scheme...regardless of color preference, the guitar's finish is in great condition with just one small ding on the face of the soundboard. Here, she is prepped for neck removal. 
What I really like about this 1995 model Celebrity is the "Brown" back. Very cool! Once I got her home and opened her up, I just reset the bridge saddle and voila - the OP24+ came to life! Awesome! 
She's got the quintad bracing with the additional reinforcement brace underneath the bridge typical of Celebrity models. 
Unlike the U.S. models which feature bolt on necks, this one is glued on and the joint looks kinda interesting. So I taped her up and she's ready for the neck removal... 
I really took my time on this one. It took about 2 hours of slowly working on the adhesive holding the neck into place. I'm not sure what kind of adhesive was used, but it didn't take long for me to realize that this guitar was victim of a failed neck reset...look at the amount of glue on that neck joint! 
Thankfully, the bowl's dovetail joint is in good shape and just needs cleaning...the neck will need a thorough going over... 
After preliminary clean-up, I had a nice mound of glue debris...kinda yellowish and a bit flexible...some kind of epoxy for sure... 
The failed reset attempt left huge gaps in the dovetail joint which were just filled with epoxy. These gaps will need to be filled with shims. Getting her back together again should be relatively easy. My 1868 Elite and my iDea Projects are still on the shelf as they will require a lot more time, but I now have the Hysol 9462 and G10 that DanSavage recommended, so I'm thinking this will be a good practice project to get a feel for the powerful adhesive. For now, all I need to do is sand down the neck dove tail joint, glue and clamp the shims in place and reset the neck onto the body and this CC247 should be as good as new! |
|
| |
|
Joined:
September 2006
Posts: 10777
Location: Keepin' It Weird in Portland, OR | Wow! I wish I had known all that back in 2007 when I bought a defective CS257.
I look forward to seeing the finished results.
|
|
| |
|
Joined:
February 2013
Posts: 176
Location: Cologne/Germany | Very interesting! Never could do that, no talent.... Keep us informed about the progress, please! |
|
| |
|
Joined:
December 2004
Posts: 556
Location: Denmark | Hi Arumako. Nice new project. The more You sand the more important it will be to recheck the neck position in order to reassure good intonation. Will You convert it to a bolt-on type of joint?
Edited by tpa 2015-09-26 8:00 AM
|
|
| |
|

Joined:
June 2012
Posts: 2303
Location: Lake Forest, CA | I'm with tpa. I would convert this to a bolt-on neck.
I am curious what technique you used to get the neck free from the body. Did you apply heat or was it strictly a mechanical action? |
|
| |
|
Joined:
December 2004
Posts: 556
Location: Denmark | I dont know if the guitars from "Ovation’s Pacific-based subsidiary" are with the Kaman bar

Source: Fig. 7 from Patent US4200023.
If so it may already have the threads |
|
| |
|
Joined:
September 2006
Posts: 10777
Location: Keepin' It Weird in Portland, OR | tpa - 2015-09-26 10:48 AM
I dont know if the guitars from "Ovation’s Pacific-based subsidiary" are with the Kaman bar
Source: Fig. 7 from Patent US4200023.
If so it may already have the threads
Quick answer... NO!
|
|
| |
|
Joined:
December 2004
Posts: 556
Location: Denmark | Then a couple of threaded steel inserts for M6 screws would be one way to go. Neck resets can bring many nice Celebrities back to a usable state. |
|
| |
|
Joined:
October 2012
Posts: 1018
Location: Yokohama, Japan | tpa - 2015-09-25 9:59 PM
Hi Arumako. Nice new project. The more You sand the more important it will be to recheck the neck position in order to reassure good intonation. Will You convert it to a bolt-on type of joint?
Thanks for the comments and suggestions tpa & DanSavage! Yes, I'm definitely planning to change this to a bolt-on configuration. After stripping the epoxy from the dovetail joint, it is pretty evident that a lot of wood was removed from the neck joint. Thankfully, the heel is still to spec, and doesn't need a lot of work. The joint will need some rebuilding even if I go with the bolt-on configuration to make sure the neck aligns properly. Intonation is definitely going to be a big concern...
I'm debating if it would just be easier to fill the dovetail joint in the bowl with a fitted piece of wood and convert to a mortise and tenon neck joint. Making the mortise joint would be relatively easy; but, I don't want to remove the fingerboard from the neck to form a precise tenon joint (my hand carving skills with a chisel are a bit questionable!). Combine this with the bolt-on configuration, and I wouldn't even need to use adhesives in the neck joint and can assemble the guitar more like a USA Elite. That way, any future neck resets would be super easy. I think this will make the neck/body joint more stable.
...of course, I'm kinda thinking I'll sell her when I'm done with this project (to build my fund to buy a new USA Ovation). So, I'm not sure if going through all the trouble will be efficient in the final analysis... hmmm, decisions, decisions...
Edited by arumako 2015-09-26 8:06 PM
|
|
| |
|
Joined:
October 2012
Posts: 1018
Location: Yokohama, Japan | DanSavage - 2015-09-25 10:55 PM
I'm with tpa. I would convert this to a bolt-on neck.
I am curious what technique you used to get the neck free from the body. Did you apply heat or was it strictly a mechanical action?
Thanks for the comment DanSavage. Yes, I applied heat...I used the hot iron and steel spatula routine to free the fingerboard from the sound board. I thought I might need to resort to steam, but I tried the Ziploc Freezer/Storage Bag method first...
Ziploc Freezer/Storage Bags are made from polpropylene and have an approximate melting temperature of 250 to 260 degrees Fahrenheit. Since water boils at 212 degrees F, and I read somewhere that hide glue liquifies at 145 degrees F (I don't think Celebrities use hide glue, but I thought that was a good reference point). I thought I could put boiling water into the Ziploc bags and rest the bags on the areas that need heating. I seal the bag air tight with about 2 cups of boiling water, and when I rest it onto the neck joint, the bag just forms right around the neck and heats the area up pretty well. As long as I'm careful about the integrity of the Ziploc bag, there is no mess to clean up! The picture above is a mock up, but I left the bag in this position for 5 minutes, then filled the bag with new boiling water and applied heat for another 5 minutes, and repeated one more time. Between each attempt, I held the body firm and wiggled the neck to see if the neck would budge. The neck began to move a bit after the 2nd try and by the end of the 3rd attempt, I could tell the adhesive was loosening up nicely. From there I just applied some consistent, but gentle nudging and she came off quite easily. Frankly, I'm not sure this would work on a neck that has a well fit dove tail joint; and for some guitars, there is a danger that the heel of the neck could come apart. Fortunately, this CC247 held together quite well. In retrospect, I think it is a better option than drilling holes and steaming the joint as that can be messy and risky if you drill in the wrong place. Since the joint construction was unknown to me before the neck removal. It seemed like the less risky method to start with...
Edited by arumako 2015-09-27 12:24 AM
|
|
| |
|
Joined:
June 2012
Posts: 2303
Location: Lake Forest, CA | Now that is a great idea. Great out-of-the-box thinking.
FWIW, HHG is pretty heat resistant except in the presence of moisture. That's why guys will drill a couple of holes into the 12th fret slot and use a steam needle to loosen the heel glue joint. As you say, it's a pretty messy affair. |
|
| |
|
Joined:
October 2012
Posts: 1018
Location: Yokohama, Japan | DanSavage - 2015-09-26 9:37 PM
Now that is a great idea. Great out-of-the-box thinking.
FWIW, HHG is pretty heat resistant except in the presence of moisture. That's why guys will drill a couple of holes into the 12th fret slot and use a steam needle to loosen the heel glue joint. As you say, it's a pretty messy affair.
Okay, that makes sense. HHG's 145 degree F melting point is contingent upon moisture! I remember reading some great threads on the OFC about hide glue.
After thinking about the bolt on conversion and the current condition of the neck's dove tail joint, I've decided to convert the neck/bowl joint to a tenon/mortise configuration. I'll fill the bowl's dovetail cavity with Smooth-on Onyx molding resin (a liquid resin that hardens quickly with minimal shrinkage), and route the mortise joint and neck block into the newly molded area of the bowl. Then I'll cut, chisel & dremel the neck joint into a tenon joint, drill holes and add the bolt on hardware. Proper alignment is going to be crucial...
...now, I just need to wait for the molding resin to arrive...
hurry, hurry, hurry... |
|
| |
|
Joined:
June 2012
Posts: 2303
Location: Lake Forest, CA | I'm not sure the mortise/tenon have to be all that precise of a fit. The bolt(s) tightness more or less lock the neck into place.
As I recall, when I did the neck reset on my friend's 1982 CE, there was a fair amount of side-to-side and top-to-bottom play. (1/16" or so)
Instead of machining the cavity into the casting resin, another possibility is to clean up the neck dovetail, removing all the resin, then wax it up with melted bee's wax. Put the casting resin into to body cavity, then clamp the neck into place so that the neck itself forms the cavity in the neck block.
After that, it should be a simple matter of drilling the holes for the bolts and installing the threaded inserts into the neck heel.
|
|
| |
|
Joined:
October 2012
Posts: 1018
Location: Yokohama, Japan | DanSavage - 2015-09-28 6:54 AM
I'm not sure the mortise/tenon have to be all that precise of a fit. The bolt(s) tightness more or less lock the neck into place.
Thanks for always providing insightful and reliable advice DanSavage. I was looking through the archives to see if I might locate documentation about the work you did on your friend's 1982 Collector's Edition but couldn't find anything on the OFC...some other forum perhaps? Your threads are always full of helpful information, and I figured it wouldn't hurt to ask... |
|
| |
|
Joined:
November 2002
Posts: 3603
Location: Pacific Northwest Inland Empire | "After that, it should be a simple matter of drilling the holes for the bolts and installing the threaded inserts into the neck heel."
Just a suggestion, which may, or may not, be obvious: Drill the holes, with the neck in the joint, to begin with. Keeps things lined up. |
|
| |
|
Joined:
October 2012
Posts: 1018
Location: Yokohama, Japan | seesquare - 2015-09-30 1:32 AM
Just a suggestion, which may, or may not, be obvious: Drill the holes, with the neck in the joint, to begin with. Keeps things lined up.
Thanks seesquare! Forgive my "ignoramosity" but if I drill the holes with the neck in place...that means I have to drill from inside the bowl...very little working space...the dremel will fit nicely, but visibility will be minimal...not sure my hands are steady enough to hit the mark and keep things squared up...is there a special tool/jig that you professionals use for this sort of thing? |
|
| |
|
Joined:
June 2012
Posts: 2303
Location: Lake Forest, CA | arumako - 2015-09-30 12:32 AM
Thanks for always providing insightful and reliable advice DanSavage. I was looking through the archives to see if I might locate documentation about the work you did on your friend's 1982 Collector's Edition but couldn't find anything on the OFC...some other forum perhaps? Your threads are always full of helpful information, and I figured it wouldn't hurt to ask...
Unfortunately, I never created a thread on the OFC for that work. I did take some pics with my phone, but have since deleted them. |
|
| |
|
Joined:
June 2012
Posts: 2303
Location: Lake Forest, CA | arumako - 2015-09-30 4:01 PM
Thanks seesquare! Forgive my "ignoramosity" but if I drill the holes with the neck in place...that means I have to drill from inside the bowl...very little working space...the dremel will fit nicely, but visibility will be minimal...not sure my hands are steady enough to hit the mark and keep things squared up...is there a special tool/jig that you professionals use for this sort of thing?
Here's how I would do it.
First, drill the holes in the neck block in the bowl from the outside.
Next, place the neck into place in the bowl, then either drill the holes from the inside using a dremel, or mark the position of the holes from the inside using a pencil and drill the holes in the heel after removing the neck from the bowl. Of the two, I'd mark the holes with a pencil and drill them with full access to the heel. To keep the drill bit square you can use a drill guide.
You'll definitely want to use a Forstner bit or at the very least a brad point bit. I would not use a regular high-speed bit as it'll be difficult to control the depth and the last thing you'll want to do is to go too deep and poke a hole in the heel. High speed drill bits also tend to wander in a hand drill whereas the Forstner and brad point bits do not.
Of the two, I'd use a Forstner bit as you will be left with a smooth, flat-bottomed hole and they're easy to control the depth of the hole.
If you use a brad point bit, use a drill stop collar to control the depth. In the modeling world, these are called wheel collars.
Once you've got the hole(s) drilled in the heel, it's just a matter of installing the threaded inserts. Some luthiers glue these in with epoxy or CA to prevent them from backing out. Of the two, I'd use a slow-set epoxy so the insert doesn't get glued half-way in.
Here's a neck reset the guy on frets.com did on a spanish-heel neck that a similar job to what you're doing.
The first few pages deals with cutting off the neck and the two pages you're interested in are on converting it to a bolt-on neck.
http://frets.com/FretsPages/Luthier/Technique/Guitar/NeckReset/BCRI...
Edited by DanSavage 2015-09-30 11:45 PM
|
|
| |
|
Joined:
October 2012
Posts: 1018
Location: Yokohama, Japan | Thanks a bunch DanSavage. That's some really helpful information! |
|
| |
|
Joined:
October 2012
Posts: 1018
Location: Yokohama, Japan | Well, watching Tennessee and DanSavage having all that fun with their various projects has given me the itch to move forward with this project. Actually, it's turning out to be more like a science project instead of a guitar restoration...here's some of the key materials I'll be experimenting with... 
I've decided to fill the dove tail cavity in the body with black resin used to cast molds. This stuff made by Smooth-on has impressive specs and dries in 5 to 10 minutes with minimal shrinkage. The mixed resin quickly heats up to the boiling point of water and dries quickly as heat dissipates so I won't have a lot of dilly dally time... the bowl needed to be completely flat to allow the mixed liquid resin to flow quickly and smoothly into all areas of the cavity...they say, "desperation is the mother of invention" and so out of desperation, I converted an old foldable coffee table to serve as my body supporting jig... 
Ooh...nice and flat! The blue foam pads ensure the sound board is protected, and it is cut to accommodate the buldging bridge. To prevent the liquid resin from flowing out of the bowl, I needed to dam up the openings with thick aluminum foil sheets. The sheets are treated with a wax similar to Beeswax (thanks for the recommendation DanSavage) to act as a release agent. 
The wood blocks and clamps simply ensure that the aluminum sheets stay in place immediately after the resin mixture is poured in. I'll fill the cavity to the top of the sound board and route a cavity to make room for the wood truss-rod block on the neck. Then I'll route the mortise into the body. I sharpened my chisels and practiced on some wood blocks to make a tenon joint, and things seem to be working out okay, and I'm building the courage to take the chisel to the actual neck. I took "tpa"s advice and went with the M6 bolts at 4cm... 
This should provide plenty of holding power and stability although... 
I'm still debating whether to go with the tapered steel inserts or the straight ones...I'll be pouring the resin into the dove tail cavity tomorrow. Feels good to make a little progress, keeping my fingers crossed...
Edited by arumako 2015-10-16 11:41 AM
|
|
| |
|
Joined:
September 2006
Posts: 10777
Location: Keepin' It Weird in Portland, OR | Arumako, you need to make sure that your photobucket photos are marked for "Public" view.
You also cannot edit a photo after you have linked it to a thread, or it won't link any longer.
Otherwise we just see an annoyed kitty cat.
|
|
| |
|
Joined:
June 2012
Posts: 2303
Location: Lake Forest, CA | arumako - 2015-10-16 9:17 AM
This stuff made by Smooth-on has impressive specs and dries in 5 to 10 minutes with minimal shrinkage. The mixed resin quickly heats up to the boiling point of water and dries quickly as heat dissipates so I won't have a lot of dilly dally time... the bowl needed to be completely flat to allow the mixed liquid resin to flow quickly and smoothly into all areas of the cavity...
If the resin gets this hot, it will probably melt the wax to the point where it will no longer serve as a release agent and allow the resin to come into contact with the bare wood, effectively gluing the neck to the bowl. =O
So, you might want to use something else as a release agent, like PVA. (poly-vinyl alcohol)
PVA is the typical product used as a release agent for fiberglass molding.
Or, contact the manufacture of the resin to find out what they recommend using as a release agent when casting wood pieces as molds. |
|
| |
|
Joined:
October 2012
Posts: 1018
Location: Yokohama, Japan | arthurseery - 2015-10-16 3:33 AM
Arumako, you need to make sure that your photobucket photos are marked for "Public" view.
You also cannot edit a photo after you have linked it to a thread, or it won't link any longer.
Otherwise we just see an annoyed kitty cat.
Oops! My bad...I changed the name of the album after I posted! So sorry everybody. Thanks for the notice OMA. I hope renaming the album to the original name fixes the problem. On my end it looks okay...how does it look out there?
BTW, thanks for the tip on the Beeswax DanSavage. Smooth-on recommends a specific release agent. I'll make sure to verify before I proceed!
Edited by arumako 2015-10-16 2:45 PM
|
|
| |
|
Joined:
June 2012
Posts: 2303
Location: Lake Forest, CA | arumako - 2015-10-16 12:31 PM
BTW, thanks for the tip on the Beeswax DanSavage. Smooth-on recommends a specific release agent. I'll make sure to verify before I proceed!
NP. I'd even test the stuff on scrap wood before proceeding to the neck. |
|
| |
|
Joined:
December 2004
Posts: 556
Location: Denmark | arumako - 2015-10-16 11:17 AM
I'm still debating whether to go with the tapered steel inserts or the straight ones...
Tapered might tend to split the two-piece neck ...? |
|
| |
|
Joined:
October 2012
Posts: 1018
Location: Yokohama, Japan | tpa - 2015-10-16 7:12 AM
Tapered might tend to split the two-piece neck ...?
I was kind of thinking that too. Straight steel inserts it is! Thanks "tpa"!
Edited by arumako 2015-10-16 5:50 PM
|
|
| |
|
Joined:
June 2012
Posts: 2303
Location: Lake Forest, CA | Buy extras to practice with in pine boards. You want to make sure you have your technique down pat before attacking the guitar. |
|
| |
|
Joined:
October 2012
Posts: 1018
Location: Yokohama, Japan | Thanks DanSavage! Took your advice and tried the tapered steel inserts. Made sure I was emulating the wood grain of the neck accurately. They worked great on pine (kind of a softer wood I think), but when I tried them on some maple blanks that I had laying around, the wood split. Yikes! I'll definitely need practice with the straight inserts as well before tackling the neck...if I've learned anything from your threads, details, details, it's all in the details! Great fun this BFLG stuff is... |
|
| |
|
Joined:
October 2012
Posts: 1018
Location: Yokohama, Japan | Had a chance to spend a few minutes movig forward again, and was able to fill the cavity with the casting resin. The stuff is pretty impressive, and hardened quickly. I am leaving it over night just-in-case. 
To get more practice with the inserts, I tested 3 different M6 types. Inserts "1." and "3." are screwed into position with a 6mm alen wrench. Insert "2." is hammered in; 1. A short collared and tapered insert, 2. A short hammer-in straight insert, and 3. a long slightly tapered insert as follows; 
This is a strip of Alder. All three of these require an 8.5mm tap for the inserts to perform at their best. The short tapered insert went in nicely, but the collar makes a flush fit in the neck joint a little problematic. You can see that the hammer-in insert just cracked the wood even with the 8.5mm pre-tap. This one is obviously for softer woods? The long insert with a very slight taper fit very nicely. The fit was tight and reliable. If I pour some ZAP thin CA glue after installing the inserts they should hold extremely well. So...steel insert #3 it is. I also am narrowing down my final bolt length choice. I originally figured I would go with the M6 4.0cm bolts, but with steel insert #3, I may not need my neck bolt to be so long. Took out a few 3.5cm and 3.0cm bolts from the tool box to test against the 4.0cm bolts. Just taking small steps forward at a time!
Edited by arumako 2015-10-17 10:26 AM
|
|
| |
|
Joined:
October 2012
Posts: 1018
Location: Yokohama, Japan | Made just a bit more progress, albeit in an unexpected direction. After thoroughly studying the neck geometry and alignment, I found that the neck was not aligned correctly (probably compromised when the failed neck reset was attempted. The neck was not aligned properly with the bridge and it was off-center by about 1.5mm to 2.0 mm. 
So I had to change my strategy, and attempt a simpler procedure that would enable me to install the neck with proper alignment. I filled the entire neck joint in the SSB with the casting resin and leveled it into shape using my trusty Dremmel. I think the proper repair method would be to use wood inserts and wood shims to refit the neck, but my main goal for this project is to experiment with the Smooth-On Black Onyx product to see if I can use it to repair my Elite 1868 Bowl. If this stuff has good adhesion with Lyrachord, I should be able to substitute this casting resin for G10, and it will probably be an easier fix, but then that's another project... 
I completely cleaned up and rebuilt the neck joint in the bowl, and have it prepped for final routing of the neck block, mortise joint and drilling of the neck bolt holes. Here's a closer shot that shows the subtlety of the skewed neck alignment. 
Progress has slowed down some, but I'm hoping to get this thing done by Thanksgiving! Can't wait to hear what she sounds like!
Edited by arumako 2015-10-22 11:19 AM
|
|
| |
|
Joined:
June 2012
Posts: 2303
Location: Lake Forest, CA | It's interesting that you completely filled up the neck block.
When I made my suggestions, I had envisioned using the neck dovetail as a male mold to build/rebuild the female dovetail in the neck block. That's why I suggested the mold release on the neck dovetail.
How soft is the molding compound? Will you be able to route it out to accept the neck dovetail? |
|
| |
|
Joined:
October 2012
Posts: 1018
Location: Yokohama, Japan | Yes, I planned on using the male dovetail as a mold to rebuild the female dovetail, but when I tried to make a bunch of dry runs and set the neck in the right place, I couldn't get the positioning correct. After taking measurements, I found that either; 1). the bridge was glued onto the sound board at a slight angle; or 2). the entire female dovetail was fabricated "slightly" off the mark (about 1.5 to 2mm). In either case, when I draw a 90 degree line from the center of the bridge toward the nut on the neck, I don't hit center of the female dovetail.
I always thought that the female dovetail was already part of the lyrachord bowl mold, but perhaps in Asia, they actually cut the female dovetail into the bowl manually? That doesn't sound right, but a misaligned female dovetail seems to suggest that may be the case...anyway, after a bunch of dry runs I couldn't get the neck to settle into the correct position. So, I figured I needed to change my strategy. Of course, I did a bunch of small trials with the casting resin, and got a feel for it first.
The Smooth-On resin product is actually very low in viscosity when you first mix it. It gets hot immediately, but will pour into any crevice like thin CA glue. After a few minutes it starts to get slimy then it becomes like a gel until it finally hardens...all in a matter of about 5 to 10 minutes (depending on the amount used). The spec sheet says it hardens to a shore D rating of 80 (which is pretty hard for a poly-resin product) with tensile strength at 5480psi, compressive strength 8760psi and a shrinkage of mere .010 of an inch.
I figured my best bet to get correct neck alignment would be to simply fill the female dovetail completely and route a mortise joint into it. So, after it hardened during my trials, I drilled, sanded, etc. and the material is quite impressive. The dremmel works like a dream on this stuff after it dries completely. If I route my neck block and mortise joint accurately, I should be able to get fairly good alignment of the neck.
On the other hand, I'll need to work the heel of the neck slightly where it joins the bowl as well. The previous work on this guitar left the neck's heel shaved down more than it should have been. I think I can probably use this Smooth-on stuff to make a shim to thicken the heel by about .25 mm. "tpa"s comment about intonation is turning out to be prophetic!
Edited by arumako 2015-10-23 4:32 AM
|
|
| |
|
Joined:
June 2012
Posts: 2303
Location: Lake Forest, CA | That makes perfect sense.
Of course, you could always just do the bolt-on conversion like what the frets.com guy did on the Spanish-heel guitar and leave the filler on the body flush, then cut the tenon off the neck. After that, just proceed with the installation of the threaded inserts.
It's the tension on the bolts that holds the neck in place, not the mortise/tenon. I should add that the mortise is molded into the body of the bolt-on Os.
The mortise/tenon on the 1983CE I did had a fairly sloppy fit which allowed the neck to be moved into proper alignment. In fact, it was this sloppy fit that allowed the neck to get out of alignment in the first place which resulted in the high action the owner didn't like. The luthier who'd done the body-swap wasn't very careful about neck alignment when he mated the neck to the new body.
All I had to do to fix the action (once I freed the soundboard extension from the body) was loosen the bolt (just one on a shallow-body O) and hold the neck in proper alignment while I re-tightened the bolt. Once the bolt was tight enough the neck didn't move.
Edited by DanSavage 2015-10-23 9:07 AM
|
|
| |
|
Joined:
October 2012
Posts: 1018
Location: Yokohama, Japan | DanSavage - 2015-10-22 10:59 PM Of course, you could always just do the bolt-on conversion like what the frets.com guy did on the Spanish-heel guitar and leave the filler on the body flush, then cut the tenon off the neck. After that, just proceed with the installation of the threaded inserts.
That would have been the easiest...but after measuring the steel insert lengths to my neck heel, it's just not meant to be that simple for me...(story of my life)!
But I decided to take just about 20 minutes to start shaping my tenon joint on the neck. I sharpened my trusty chisel again, and practiced on some blanks and made some really good progress. Actually, I was pretty surprised and pleased with the straightness of my first-half of my first ever tenon joint, but... 
I found a nice little hole right where I cut the tenon joint! What in the world is that? 
...Ummm, now that just doesn't look right to me. The USA necks are solid wood (w/aluminum for k-bars), but this one has a hollow spot...actually it looks like it's a hole for a dowel? What the ???... So for now, I'm stopping to evaluate, and try to figure out what this really means. It kind of reminds me of an Ibanez that I repaired for a friend about an year ago with a messed up neck. I had to remove the fingerboard completely for that one, and look what I found... 
...and this one came from the factory like this...yikes! Anyway, I just filled what I can and fixed it up, but I'm sure the Celebrity neck is not this bad. I am worried that the "dowel" hole might go up into the truss rod cavity making it very hard to fill the gaps... Another interesting turn as the plot to repair this guitar thickens! Great fun!
Edited by arumako 2015-10-26 7:06 AM
|
|
| |
|
Joined:
June 2012
Posts: 2303
Location: Lake Forest, CA | You're certainly doing this differently than I would have proceeded. I would have left the mortise in the body alone. It's got plenty of thickness to take the stress of the neck being bolted to it.
I would have just cleaned the glue off the tenon on the neck so that it could fit easily into the mortise. Then, I would have drilled the holes in the mortise and installed the inserts into the neck.
I'm afraid that chiseling the tenon square is going to weaken the tenon too much. |
|
| |
|
Joined:
October 2012
Posts: 1018
Location: Yokohama, Japan | DanSavage - 2015-10-26 2:08 AM
You're certainly doing this differently than I would have proceeded. I would have left the mortise in the body alone. It's got plenty of thickness to take the stress of the neck being bolted to it.
I would have just cleaned the glue off the tenon on the neck so that it could fit easily into the mortise. Then, I would have drilled the holes in the mortise and installed the inserts into the neck.
I'm afraid that chiseling the tenon square is going to weaken the tenon too much.
I hear ya DanSavage. I might end-up regretting my course of action before this one comes to a close, but I'm not ready to give-up just yet. At this point, filling the hole and reinforcing the tenon are going to be crucial. It looks like I might need to add shims with hysol 9462, and re-cut the tenon before I cut the mortise and install the inserts.
By cutting a clean tenon and mortise, I was hoping to get accurate alignment of the neck to the body. So I was going for a pretty tight fitting neck/body joint. At present, the heel of my neck is not square to the bowl because the neck was off-center. So I need to square that up too. But I must say, I am learning a lot, and I definitely think the Smooth-On resin will be just the right material to fix my 1868 Elite bowl. Hopefully, I'll be able to make a good recovery! |
|
| |
|
Joined:
December 2004
Posts: 556
Location: Denmark | It almost looks like a peekhole into a cavity that would be stuffed with Kaman bar - had it been a Kaman bar neck. Is it possible to see if the whole corner with the male part of the dove tail is not an integral part of the neck wood but a separate piece glued on?
If this is the case you can remove the block from the neck and cut a new block which you can fit to perfection to the body with dovetail threaded inserts and all and then glue the neck onto the block when everything fits well.
Now that you have made the casting you could also do a little experiment and see if you could machine a joint so you could use the neck from the 1868 with this bowl, if the neck from the 1868 is separate from the bowl - I dont recall. Not that you should give up on the 1868 because that is another nice project. :-)
Edited by tpa 2015-10-26 6:11 PM
|
|
| |
|
Joined:
October 2012
Posts: 1018
Location: Yokohama, Japan | tpa - 2015-10-26 7:48 AM
It almost looks like a peekhole into a cavity that would be stuffed with Kaman bar - had it been a Kaman bar neck. Is it possible to see if the whole corner with the male part of the dove tail is not an integral part of the neck wood but a separate piece glued on?
If this is the case you can remove the block from the neck and cut a new block which you can fit to perfection to the body with dovetail threaded inserts and all and then glue the neck onto the block when everything fits well.
Now that you have made the casting you could also do a little experiment and see if you could machine a joint so you could use the neck from the 1868 with this bowl, if the neck from the 1868 is separate from the bowl - I dont recall. Not that you should give up on the 1868 because that is another nice project. :-)
Thanks for the observant (as usual) comments "tpa"! I wonder if it is a slot for a Kaman bar. Maybe the Korean made Os from the 1990s used USA style tooling?
I checked the male dove joint on the neck, but it is definitely not a separate glued on piece. However, if Hysol 9462 is as strong as I've heard, then maybe it won't have any problems holding the neck together even if the original male dove tail was cut off and replaced with a separate block of wood. I like the idea of trying my 1868 neck on this Celebrity as well. I didn't even think about that; but then, the 1868 is SSB and this Celebrity Mid-Depth (I think I may have mistakenly called it an SSB earlier in the thread, sorry).
So, in the final analysis, I've decided to shape some hardwood shims and reshape the tenon using as much of the what is left as possible. Extend the tenon, apply the inserts and go from there. Pics to come soon... |
|
| |
|
Joined:
October 2012
Posts: 1018
Location: Yokohama, Japan | Trying to get back on track! The neck is going to take some doing, but I was hoping to get things headed back in the right direction; and so...I made a shim out of alder wood scraps... 
It's shaped to fit over the current male dovetail and I'm hoping with Hysol 9462 filling in the gaps and the steel inserts the block will be able to perform the function of a strong tenon joint. 
Of course, I'll fill up the strange hole with epoxy or the casting resin. If this assembly works, I'll chisel it down to its final configuration and paint it all flat black. Hope this works...wait a minute...I think I'm gonna sleep over this before I proceed! Comments would be most appreciated! |
|
| |
|
Joined:
June 2012
Posts: 2303
Location: Lake Forest, CA | If you're going to fill the cavity with resin, I'd choose hysol over the casting resin.
You should be able use one of these syringes, or something like it to inject the glue.
http://www.lmii.com/products/finishing/adhesives/glue-syringe 
I think the combination of hysol and the steel inserts will do a good job of holding your neck tenon patch into place. |
|
| |
|
Joined:
December 2004
Posts: 556
Location: Denmark | arumako - 2015-10-27 10:31 AM
... I'll fill up the strange hole with epoxy or the casting resin. ... Comments would be most appreciated!
I'd consider filling the cavity only if it seems to serve a purpose. Also it could make sense to start checking that doing so will not compromise the function of the truss rod. Glued correctly I don't think that your build up wood for the dovetail will be less worthy than solid wood. Actually you have some extra wood for the threaded insert and you have a cross going piece of wood which reduce the risk of splitting the neck in the middle. It could be interesting to look down the hole with an endoscope. USB endoscope cameras are available for the people nowadays at reasonable prices.
Edited by tpa 2015-10-27 2:42 PM
|
|
| |
|
Joined:
June 2012
Posts: 2303
Location: Lake Forest, CA | tpa - 2015-10-27 12:30 PM
I'd consider filling the cavity only if it seems to serve a purpose. Also it could make sense to start checking that doing so will not compromise the function of the truss rod.
Good point. |
|
| |
|
Joined:
October 2012
Posts: 1018
Location: Yokohama, Japan | DanSavage - 2015-10-27 5:46 AM tpa - 2015-10-27 12:30 PM
I'd consider filling the cavity only if it seems to serve a purpose. Also it could make sense to start checking that doing so will not compromise the function of the truss rod. Good point. Hey, thanks for the valuable input! So now, I get to use the mighty Hysol 9462 for the first time on this project! It is so cool to get to learn all this new stuff on the BFLG...and this Hysol stuff is applied using a cool looking glue gun! 
Look out! Hysol applies nice and thick and hardly "runs" at all. Very stable looking stuff...my craftsmanship does not do this product justice, but I applied plenty of adhesive to make sure the glue was overflowing out of all sides and corners, wiped it down and then clamped and rubber banded it all together and then wiped it down just lightly again with a dry paper towel... 
For now, I've decided not to fill the mysterious hole in the neck, but in order to fully get the geometry on the heel assembly correct, I have a feeling I'm going to have to do more shimming and shaping. Now to wait 72 hours! Ooh, I hate waiting...dry quickly, dry quickly! |
|
| |
|

Joined:
September 2012
Posts: 809
Location: Thredbo, NSW, Australia | Thanks arumako for the update. I've had one small BFLG repair on my 1614, but I'm keeping my eyes open for another candidate as I'd love to try again with something more ambitious.
I've learnt a lot from yourself, Dan and all the other good folk here at the OFC.
Keep 'em coming!
|
|
| |
|
Joined:
June 2012
Posts: 2303
Location: Lake Forest, CA | If you go back and look at the most recent factory tour video (2007?) you can see the workers use the same glue gun to glue the rosette into the groove. They're using a quick-dry clear glue, but the gun they're using is unmistakable.
Looks good. I know this probably goes without saying, but you did mix the two parts of the hysol, right?
Yes, one of the nice things about hysol is that it's thixotropic, meaning that it behaves like a liquid when being manipulated (mixed, applied, etc.) but behaves like a solid when left alone. As you've discovered, it doesn't run.
Hysol only requires 72 hours to reach 'full' strength. As long as you've allowed the glue to cure in a warm area, after 24 hours you can probably take the clamps off and start carving away.
Edited by DanSavage 2015-10-29 9:36 AM
|
|
| |
|
Joined:
October 2012
Posts: 1018
Location: Yokohama, Japan | Thanks for the encouragement BanjoJ!
DanSavage - 2015-10-28 11:33 PM
If you go back and look at the most recent factory tour video (2007?) you can see the workers use the same glue gun to glue the rosette into the groove. They're using a quick-dry clear glue, but the gun they're using is unmistakable.
Looks good. I know this probably goes without saying, but you did mix the two parts of the hysol, right?
Yes, one of the nice things about hysol is that it's thixotropic, meaning that it behaves like a liquid when being manipulated (mixed, applied, etc.) but behaves like a solid when left alone. As you've discovered, it doesn't run.
Hysol only requires 72 hours to reach 'full' strength. As long as you've allowed the glue to cure in a warm area, after 24 hours you can probably take the clamps off and start carving away.
Yes, I did mix the two parts very well before applying. The gun is so cool because it issues the same amount of resin and hardener, and yes, I did see that on the video...I suspect 9462 would be too powerful for a rosette!
The "thixotropic" (I'm even learning new English words on the BFLG!) quality of Hysol 9462 is quite impressive...seems pretty toxic though. Just a bit on my fingers and it started itching. Definitely need to use gloves and goggles (or glasses) when working with this stuff!
It feels good to be headed in the right direction again! I won't be able to give this project my attention over the weekend unfortunately; but that is just as well, as I am bound to rush things and mess it up whenever I'm given the opportunity! LOL!
Edited by arumako 2015-10-29 10:51 PM
|
|
| |
|

Joined:
December 2006
Posts: 6992
Location: Jet City | arumako - 2015-10-29 1:37 AM
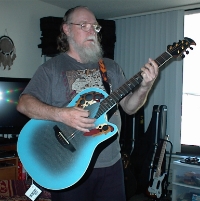
Nice Calendar. I had no idea when Patrick picked October that I was going to get to see my guitars hanging on walls in New Hartford. They know the 6 string pretty well. They've seen it twice and had to refish it. I heard white is one of the tougher finishes to do. |
|
| |
|
Joined:
October 2012
Posts: 1018
Location: Yokohama, Japan | Damon67 - 2015-10-30 12:37 AM
Nice Calendar. I had no idea when Patrick picked October that I was going to get to see my guitars hanging on walls in New Hartford. They know the 6 string pretty well. They've seen it twice and had to refish it. I heard white is one of the tougher finishes to do. Your 6 and 12 string Pearl White Elite pair are amazing Damon67. The fact that they were featured on the calendar in the month of the Mother Ship's Re-birth and the fact they were on the walls at NH during the Re-Birth celebration is incredibly poetic and maybe even prophetic (Ooh! goose bumps)! As for me, my enthusiasm for the return of the Mother Ship was fueled by looking at Patch's OFC Calendar everyday in my office! Thanks Patch. The calendar is even my inspiration to get my BFLG projects done right! I can't wait to see more of your picture in the 2016 OFC Calendar Damon67!
Speaking of getting my BFLG projects done right...I noticed that, per Dansavage's advice, the Hysol was completely dry after 24 hours (at least the stuff exposed to the air). After about 36 hours the stuff was hard as nails - very impressive; and so, I couldn't resist trying to make a little progress and ended up spending an hour on rebuilding my neck tenon joint today afterall... I shaved the truss rod block from a width of 3.5mm down to a svelt 3.1mm to make sure the block didn't interfere with the fit on the bowl. 
I tested the truss rod movement and made sure the mysterious hole was not connected to the truss rod trench, and filled up the hole. 
Smooth-On casting resin came in handy again to make the shim to fix the heel. I will still need to shape it for the final fit with the bowl, but I've been able to restore the heel to acceptable flatness. 
The powerful Hysol 9462 adhesive filled all the gaps in my tenon reinforcement perfectly and powerfully and was very easy to work, but much much harder than the casting resin! Just for fun, I thought I'd compare the neck to my 1868 SSB Kaman Bar neck (Haven't gotten around to cleaning it up yet)... 
Very interesting differences in the Kaman Bar USA neck and Celebrity Asian neck! I'll paint the tenon joint flat black to finish her up and practice routing the mortise joint for the bowl on some blank wood. That will enable me to verify final fit and neck position. If I get it right, I can use my "practice" mortise joint as a jig to drill my insert holes in the neck and bolt holes in the bowl. Just a few more steps to go...Woo hoo!
Edited by arumako 2015-10-31 7:53 AM
|
|
| |
|
Joined:
October 2012
Posts: 1018
Location: Yokohama, Japan | arumako - 2015-10-30 9:29 PM
I shaved the truss rod block from a width of 3.5mm down to a svelt 3.1mm to make sure the block didn't interfere with the fit on the bowl.
Oops...that would be 35mm to 31mm! |
|
| |
|
Joined:
June 2012
Posts: 2303
Location: Lake Forest, CA | Nice job. It looks great. Very clean work. |
|
| |
|

Joined:
August 2007
Posts: 1008
Location: Tuscany, Italy | DanSavage - 2015-10-30 8:58 PM
Nice job. It looks great. Very clean work.
+1
 |
|
| |
|
Joined:
October 2012
Posts: 1018
Location: Yokohama, Japan | So...the progress has slowed down to a grinding crawl. However, still trying to devote a little bit of time here and there for a Thanksgiving Project Completion! And my son, somehow discovered this secret project...man, how do they "find me out" like that? Lol, anyway, I was able to squeeze in some time to get the main neck block space routed into the filled neck joint area of the bowl. Needed a small jig to keep my router straight and true... 
This little jig is clamped into place (sorry about the low-res photo) through the epaulets. Clear acrylic jigs enable me to see my work more accurately. The aluminum bars are guides that keep my router (Dremel) in-line. 
I practiced a bunch on some wood blanks, but this Smooth-on stuff is pretty hard. I had to set my Dremel to the highest setting and go slow. I had forgotten how unforgiving a router can be and on my first pass, I tried to take-off too much and lost control of the tool and almost hacked this poor CC247 into oblivion! Fortunately, the damage was minimal, and I was able to continue without major incident...whew, scary! Once my nerves settled down, I got back to work...shallow, slow, very slow cuts. What a dummy, that's what I made the jig for! talk about an amatuer! 
After final sanding and smoothing the neck block fit just right. You can tell the alignment is much better in this next pic. It also shows how far the alignment was off for the original assembly. No wonder why the previous owners neck reset failed. 
So, my next challenge is to cut the mortise into this little block. I'll need to make another jig for that, and also think of a good clamping strategy to make sure I get the neck secure. The bolt-on neck configuration is really going to make a world of a difference! As Christmas season approaches, I'm thinking this might be a good "O" for a Christmas performance! After that, I know my son is going to ask if he can have it! I'm thinking I'll offer a 1 to 1 fair trade for his black 1861! Would that be taking unfair advantage of my son? Naw..., whoohoo...getting closer...
Edited by arumako 2015-11-13 9:34 PM
|
|
| |
|
Joined:
September 2012
Posts: 809
Location: Thredbo, NSW, Australia | Great stuff arumako. I'm really enjoying this and learning heaps as we go. |
|
| |
|
Joined:
October 2012
Posts: 1018
Location: Yokohama, Japan | BanjoJ - 2015-11-13 1:43 PM
Great stuff arumako. I'm really enjoying this and learning heaps as we go. Thanks BanjoJ! Couldn't get any sleep tonight, so took a few steps forward again. Decided to finish up the neck joint completely. Per DanSavages advice, I went ahead and used an Auger bit to drill the insert holes and installed the steel inserts into the neck tenon joint... 
I made sure to squeeze the tenon joint with clamps as I screwed in the inserts, but the joint cracked ever so slightly when I installed the lower insert anyway! Oops. The crack was pretty small so I filled it with super low viscosity CA glue... 
Everything lined up pretty well... 
Finished the block and joint with some light sanding and flat black finish (used polyurethane automobile touch-up paint). Finally, verified bolt length and alignment... 
It looks like 3.0cm bolts are going to work the best. Cool! Now, if I could just route the mortise and drill the holes in the bowl correctly, this is all going to come together rather nicely! Okay, time to catch some Z's...
Edited by arumako 2015-11-16 11:37 AM
|
|
| |
|
Joined:
June 2012
Posts: 2303
Location: Lake Forest, CA | Looking good. Almost there. |
|
| |
|
Joined:
October 2012
Posts: 1018
Location: Yokohama, Japan | DanSavage - 2015-11-16 11:05 PM
Looking good. Almost there.
Thanks for always being so encouraging DanSavage! It's a holiday over here in Japan, and it's a sprint to the finish line...Before routing the mortise, I needed to drill the neck bolt holes in the bowl. With concise caliper measurements of the neck block, I made a simple foldable drilling jig out of cardboard with clear markings (on both sides) for the center lines and bolt holes... 
taped it on to the bowl with precise positioning... 
folded it over... 
verified alignment... 
setup the Dremmel with proper alignment... 
verified alignment, and drilled small accurate guide holes for the Auger bit (actually, I realized latter that Dansavage said "Forstner bit" but I actually went out and mistakenly bought Auger bits, oops)... 
I finished the drilling with a 6.5mm Augers bit, and removed the cardboard jig... 
proceeded to the routing... there wasn't a lot of flat space for a routing jig; and so, I decided to go with a freehand route using the routing guide from my circle cutter... 
set-up the tool... 
and cut the mortise...go slow and shallow, slow and shallow... 
after many passes, I finally got it done. I'm pretty happy with my first ever mortise joint. 
Then the neck heel needed to be shaped for final fitting, the sandpaper is reinforced on the back with thick clear packing tape. With the neck in proper position, I pull the tape out from the heel and sand it down to the exact shape of the bowl... 
checked by dry fitting and repeated...warning, patience tester here... 
then checked my neck angle. Ahhh, perfect... 
and proceeded to final fitting and gluing. I had to do a bunch of clamping dry runs to ensure this was going to work, okay. Man, these Elite type guitar necks are hard to secure with clamping (oops, sorry about the "out of focus" picture)! 
I used ZAP 30 minute epoxy (from my 1117-4 project) to glue the neck to the sound board (no glue on the heel of the neck please!). The neck was secured tightly and once the clamps were in place, I loosened the bolts just a tad. Everything fit just perfectly and the neck is now completely in line! Yay! And now, for the treacherous 72 hour wait! Don't touch the guitar, Ken. Don't touch the guitar! Can't wait to string her up and give her a spin! I'm not quite done yet; but man, I am so thankful for all of your help and encouragement! OFC/BFLG you are so awesome! Thank you, thank you, Domo Arigatou!
Edited by arumako 2015-11-22 7:54 PM
|
|
| |
|
Joined:
February 2014
Posts: 699
Location: moline,illinois | That is amazing work all the way through,I doubt I'd have the patience you've shown but the end result has to make you feel great. |
|
| |
|
Joined:
June 2012
Posts: 2303
Location: Lake Forest, CA | Wow!
Real precision work here, Ken.
I'm not sure the Zpoxy needs 72 hours to fully cure like Hysol does.
When you're done, you'll have one of the few Celebritys in the world with a bolt-on neck.
Dan |
|
| |
|
Joined:
August 2007
Posts: 1008
Location: Tuscany, Italy | Very nice job Arumako. My compliments. Amazing work. Thanks for sharing. |
|
| |
|
Joined:
December 2004
Posts: 556
Location: Denmark | arumako - 2015-11-22 7:47 PM... and so, I decided to go with a freehand route ... Cool. What is btw. the idea of gluing the fretboard to the top, if I may ask?
Edited by tpa 2015-11-23 5:01 PM
|
|
| |
|
Joined:
June 2012
Posts: 2303
Location: Lake Forest, CA | You probably wouldn't notice that the fretboard isn't glued down until you tried to play the upper frets, then you'd get hollow notes.
I'm not sure which models, but some Ovations with bolt-on necks have a support underneath the fretboard extension which allows the neck to be removed without breaking the glue joint and supports the fretboard extension so it doesn't get hollow sound when the strings are fretted there. |
|
| |
|
Joined:
December 2003
Posts: 846
Location: Canada | I thought that most of the ovations are supposed to have floating fretboards. Or are these just some specific models?
And thanks for the report arumako... Well written and very informational. |
|
| |
|
Joined:
October 2012
Posts: 1018
Location: Yokohama, Japan | Thanks for the kind remarks, folks...
DanSavage - 2015-11-22 11:14 PM
I'm not sure the Zpoxy needs 72 hours to fully cure like Hysol does.
I went back and checked Pacer's spec sheet and it says 24 hours. Woohoo...but, I think I'm going to wait 36 hours just in case. I just need to touch-up some areas on the bowl with a matching brown paint, add some shims where the M6 bolts meet the bowl to prevent any damage to the bowl, put new foam on the manhole cover, string her up and take her for a spin ..hurry hurry hurry...
tpa - 2015-11-23 6:59 AM
Cool. What is btw. the idea of gluing the fretboard to the top, if I may ask?
Exactly what DanSavage said. I suspect hard debris stuck between the fret board and soundboard could cause some serious buzzing. FWIW, I've heard the 1537s and 1581s have floating fret boards, but a search on the net doesn't seem to provide any conclusive guides to model numbers and the like. DanSavage previously posted a link to an interesting article in Guitar Player that talked a little bit about floating fret boards on LX models here...
http://www.guitarplayer.com/miscellaneous/1139/ovation-lx-series/19... |
|
| |
|
Joined:
June 2012
Posts: 2303
Location: Lake Forest, CA | Cool article. It contains lots of technical details:
1) Advanced Neck System.
An extended support block under the fingerboard from the 14th fret where it meets the body almost to the end of the fingerboard. It sits in a pocket that’s built into the backside under the top and from there it’s attached to a new block in the bowl. What it gives us is a surface from the top of the fingerboard to the back of the bowl that’s all integrated. There’s no room for any movement. We also put some graphite strips in the neck to add stability without adding weight.
A 2-way tension rod that is lower profile. We’ve taken some mass out. We can make the neck profile a little smaller for players who want that. The Advanced Neck System is a 2-way tension rod with support paths attached under the fingerboard and at the heel with bolts. It’s machine fit—Nothing is glued.
2) LX Brace System
Used a laser vibrometer to test and measure how the top moves. Identifid places in the top that vibrated more and places that vibrated less and where it gets phase cancellation—just an abundance of information. Lots of data from this machine but unless you know how to analyze it, it’s useless. Found a way to analyze the tops to maximize the response. The result was the scalloped X-brace pattern that’s in the LX series.
3) Thinner finish.
Polyester finish in top. At one time the finish thickness was running between 30 and 35/1000 of an inch. It's been reduced over the past five years to the point where it's now between seven and 10/1000.
|
|
| |
|
Joined:
December 2004
Posts: 556
Location: Denmark | I see the advantages of a good fretboard support. It just seems to me that the fretboard extension is fairly well supported by the (invisible) chunk of wood extending into the body cavity. It hardly does anything to the vibration of the top as there is no free vibrating top there on this type of guitar. But it does affect the work involved if you need to remove the neck again - like if you (in far future) need to correct intonation or adjust neck angle. The gap could also be sealed with something else - a piece of felt or a suitable rubbery sealant compound. |
|
| |
|
Joined:
November 2002
Posts: 3603
Location: Pacific Northwest Inland Empire | Hide glue. Steam it, & it comes right apart. |
|
| |
|
Joined:
June 2012
Posts: 2303
Location: Lake Forest, CA | tpa - 2015-11-24 9:12 AM
I see the advantages of a good fretboard support. It just seems to me that the fretboard extension is fairly well supported by the (invisible) chunk of wood extending into the body cavity.
Actually, you do bring up a good point.
Unlike most guitars, Some Ovations do have a chunk of wood attached to the neck and the fretboard extension.
On those Ovations, you probably wouldn't need to glue the fretboard extension to the top.
But, for those Os which do not have the chunk of wood, you still need to glue the fretboard extension to the top to prevent the hollow sound. |
|
| |
|
Joined:
October 2012
Posts: 1018
Location: Yokohama, Japan | Well, I strung up the CC247, adjusted the truss rod, and left it for several hours to see how the neck settled in. Don't particularly care for these small radius and thin 1&11/16" (@ nut) necks. It feels too cramped up... like they were really going after the electric guitarists with these Asian models. Anyway, I really like regular gauge strings on all my acoustics (usually D'Addario EJ12 80/20 Bronze) and the action at the 12 fret is right at 2mm... 
The neck went on really straight... 
Looking through the epaulets, you can tell something is different about this Celebrity! The bolts really secure the neck in place quite reliably. For some, it may seem to make the guitar a tad heavier, but it is hardly noticeable. 
I'm kind of getting fond of this GS color scheme too. The regular gauge strings usually tend to give the guitar a thicker voice, but this Celebrity rings like a bell even with regular gauge strings. She's also quite a canon, and I really like the OP24+ pre-amp as it provides mellower sound options. 
As it turns out, I'm going to need to run through and do a general tune up as the nut needs to be cut down just a bit, and general fret maintenance is needed. But at this point the intonation is in order; and while she's no Nakao USA NH Elite, she still sounds pretty good. Just really surprised about the "ringy" bell like sound of the guitar. I wonder if its because of the laminated top? Not that the mid and bass punch aren't there, just a real emphasis on the high-frequency resonance - unexpected... Anyway, thanks for all of your encouragement and comments, I'll definitely be using this for a Christmas performance. Oh, and Happy Thanksgiving to all of you at the OFC! So thankful to be a part of this cool round back community!
Edited by arumako 2015-11-25 9:47 AM
|
|
| |
|
Joined:
September 2012
Posts: 809
Location: Thredbo, NSW, Australia | Wow! Outstanding. Another guitar saved from the scrap heap.
Thank you so much for sharing this journey with us. |
|
| |
|
Joined:
June 2012
Posts: 2303
Location: Lake Forest, CA | Nice job, Ken.
You might try PBs instead of the 80/20s. I tried 80/20s on my mid-bowl laminated top O and found they didn't sound as good as the PBs. |
|
| |
|

Joined:
May 2011
Posts: 751
Location: Muenster/Germany | Wonderful guitar, great job,MTBBWY. |
|
| |
|
Joined:
October 2012
Posts: 1018
Location: Yokohama, Japan | Thanks again everybody!
DanSavage - 2015-11-25 2:53 PM
Nice job, Ken.
You might try PBs instead of the 80/20s. I tried 80/20s on my mid-bowl laminated top O and found they didn't sound as good as the PBs.
I'll definitely give the Phosphor Bronze a shot. I've heard that laminate tops are harder and tend to intensify the higher frequencies. I've played and heard some decent CS257 and CS247, but none of them sounded this "chimey" I know some folks prefer the bell like ringing tone, but I find darker subtle tones to be more expressive. All a matter of personal preference really...
Aside from the fret areas that need some maintenance, this guitar has pretty impressive sustain as well. Although no match for a USA produced O, I'm convinced a properly assembled Asian O can be very very good indeed.
By the way, DetlefMichel, what does MTBBWY mean? May The "?B?" Be With You??? |
|
| |
