|
|
Joined:
August 2016
Posts: 61
| Hi all,
I am a new member, longtime reader of this fan-site. I am currently re-topping a Pacemaker. I am an experienced luthier, repairman and longtime Ovation owner. Here is my question.
Do you think the value of this will matter whether I restore it to its original setup or not? I haven't been really excited about the current selling prices on these vintage 12 strings anyway.
So I can't see a big loss of value if I customize it. I have the ability and experience to make this a really dressed up one off Pacemaker. Would that make it more desirable to an Ovation customer?
I intend to sell it when done. What do you fans think?
Thanks for being a great fan site.
Rick Giannini |
|
| |
|
Joined:
December 2003
Posts: 846
Location: Canada | I am currently looking for a 12-fret 12-string but mainly for the higher end Custom Legend 1658 or ideally a UTE-681. I would definitely be interested in a customized one, though my focus is on playability and sound. Not sure if I would be willing to pay much of a premium for customization though, really depends on specific "value added" features.
Edited by d'ovation 2016-09-15 2:54 PM
|
|
| |
|
Joined:
March 2005
Posts: 12750
Location: Boise, Idaho | I don't pretend to know marketing, but as a buyer and frequent shopper, I haven't seen much demand for "dressed up one off" Ovations of any type. The sales of the annual Collectors' series petered off and many of the limited editions didn't sell out. I would bet if Ovation made 50 Pacemaker reissues they might have trouble selling them. My guess is that you couldn't resell it for what it would take to compensate you for your effort. |
|
| |
|
Joined:
August 2016
Posts: 61
| Thanks d'ovation for your comment. Playability/sound is a top priority for me also.
I am definitely leaning towards a different rosette style and purfling/binding. It is a 1115-1 and I
hope to offer the potential buyer a more attractive guitar than just another sunburst 12 string that is 40 years old. I am not anticipating making a ton of money on this anyway, because, as much as I love them, 40 year old Ovations tend not to be highly valuable in the same sense that, say, a vintage Martin or Gibson might be.
I guess I am wanting to give this Pacemaker a new life with a special face. This little Pacemaker top was so destroyed by a hack I want to give her a real big re-birth. If it never sells, so be it. I have a nice place for it in my collection.  |
|
| |
|
Joined:
August 2016
Posts: 61
| Yes Mark, that is exactly the kind of reasoning that has been going through my mind, and I hoped if I asked you fans this, I would get some good answers. I am documenting this with pics, so maybe I can put up this
job here for your pleasure. But there has already been some great posts of this type of top re-placement
so I am not sure of the interest of the members.
|
|
| |
|
Joined:
September 2006
Posts: 10777
Location: Keepin' It Weird in Portland, OR | Oh, Hell Yeah.
Each rebuild is different.
Post pics. Post Video! 
Edited by Old Man Arthur 2016-09-15 5:11 PM
|
|
| |
|
Joined:
March 2005
Posts: 12750
Location: Boise, Idaho | We'd really appreciate your pictures and your efforts. There are some good amateurs here and some like me that really appreciate the craftsmanship, but aren't motivated to try to tackle it ourselves. We even have one notorious painter. |
|
| |
|
Joined:
August 2016
Posts: 61
| Wow, what a bunch of nice people! Thanks for your kind replies. I will carefully read the picture posting instructions
and give it my best shot.
Rick |
|
| |
|

Joined:
June 2012
Posts: 2303
Location: Lake Forest, CA | sandshark - 2016-09-15 11:43 AM
I intend to sell it when done. What do you fans think?
Hi Rick,
Welcome.
IMO, if you're going to the trouble to re-top the guitar, you might consider using torrefied Adirondack spruce top and braces.
It would be interesting to hear a 12-fret, 12-string using this wood.
Dan |
|
| |
|
Joined:
August 2016
Posts: 61
| Hi Dan,
Thanks for your suggestion. I do not have any torrefied spruce in my stock, so I am using a nice aged sitka.
However, the instructions for posting my pics is extremely confusing greek to me. Why can I not copy/paste from my photo files? |
|
| |
|
Joined:
August 2016
Posts: 61
| Can I just use the upload personal photo in my control panel? |
|
| |
|
Joined:
September 2006
Posts: 10777
Location: Keepin' It Weird in Portland, OR | Rick... "Upload Personal Photo" just adds a photo to your Profile Page.
You can go to "Albums" up near the "Control Panel" Button and create an Album.
Or you can upload photos to Photobucket or FarceBook or other hosting site, then post the link here.
Or you can check the "Attach a file after posting" box and attach a file after posting.
If you do that be sure that the photo is less than 600 width or you will get a HUUUUGE photo that nobody can really enjoy and it will make the whole thread wider than you computer screen.
Good Luck with that.
I usually post my photos to Photobucket, then resize them to 600 wide.
Then post them here using "img" and "/img" in Braces.
Hope this is Helpful.
|
|
| |
|
Joined:
August 2016
Posts: 61
| Ok Arthur, thanks for the advice. |
|
| |
|
Joined:
August 2016
Posts: 61
| OK, This is now going to take a little more work. The add an attachment prompt limits me to 100 KB.
Very tiny pic. Feeling pretty stupid here.
Rick  |
|
| |
|
Joined:
August 2016
Posts: 61
| For the time being, I made an album to show my progress. That was easy. Will work on getting adept at posting in the threads. |
|
| |
|
Joined:
October 2014
Posts: 268
| Thanks for the photo album. I was surprised that you didn't just remove the neck, isn't it a bolt-on? It seems like doing so would simplify the rest of the work even if it doesn't need a re-set. |
|
| |
|
Joined:
May 2011
Posts: 751
Location: Muenster/Germany | I am also looking for a 12string 12fret Ovation, and it does not have to be original. I had a wonderful 1658 sunburst, but it has broken and is past remedy.
Many of old Ovation guitars have a "hump" behind the 12th fret, the older models have glued necks and thus this problem is not easy to solve. The younger Ovations have bolt-on necks, with these it takes me an hour or so tomake a neck-reset.
Did you examine your 12string in this respect? (A good Ovation must have a string action of 2,25mm at 12th fret on E 6th and should be playable on the whole fretboard. Little by little I managed to fine-tune almost all of my Ovations to this standard, there are only one or two waiting for this procedure.)
Are you planning to sell your guitar when it´s finished? And if so, can you make a rough estimate of what you want to charge? I´m so fond of 12string guitars that I might be highly interested.
And are you planning to built a different bracing pattern? That was the only thing that I disliked on the Pacemaker, the A-braced custom legend sounded so much better. I have a custom-made (wood) 12string guitar with offset soundholes and a kind of classical fan braces, and this guitar is a cannon. If you consider that 12strings are mostly tuned at least one halfstep down, you may use a slightly lighter construction than usual for the guitar.
OMG, all this is so hard to explain if I can not write it in my mother-language, but I hope you understand what I´m talking about. The good old X-braces are in my opinion not the ultima ratio.This would be a chance to make an Ovation 12string that could outplay any other one. |
|
| |
|

Joined:
December 2006
Posts: 6992
Location: Jet City | 

 |
|
| |
|
Joined:
June 2012
Posts: 2303
Location: Lake Forest, CA | Doesn't that look familiar.
I've got a couple of re-tops I'm going to be starting on this weekend, myself. |
|
| |
|
Joined:
August 2016
Posts: 61
|
Damon67, thanks for moving my pics to the thread. Your great!! I will figure it out eventually.
Well, how nice to get so much action on my project. OK, here are some answers to the questions you all have.
It is not a bolt on neck. The neck was still set nice, so I didn't mess with it. Fretboard is in quite nice shape, some minor wear on the lower 4 frets.
I am still determining the bracing pattern. I feel that the original fan pattern was a little weak in the bridge area, for a 12 string, so I may tweak it, or go to a X pattern.
I plan on selling when done, if it meets my approval to sell. No idea on price.
Still working on the rosette design.The electronics are fine, but needs a new plastic saddle top piece. The pickup works fine.
Currently working on the top spruce prep. Dan, I have thoroughly enjoyed watching your work. I am also an old model airplane guy. |
|
| |
|
Joined:
August 2016
Posts: 61
| OK, posted a pic of the bracing on the removed top in my album. Plus a few pics of some of my other guitars. |
|
| |
|
Joined:
September 2006
Posts: 10777
Location: Keepin' It Weird in Portland, OR | sandshark - 2016-09-16 4:03 PM
OK, posted a pic of the bracing on the removed top in my album. Plus a few pics of some of my other guitars.

|
|
| |
|

Joined:
October 2012
Posts: 1018
Location: Yokohama, Japan | sandshark - 2016-09-15 8:17 AM
Wow, what a bunch of nice people! Thanks for your kind replies. I will carefully read the picture posting instructions
and give it my best shot.
Rick
Hi sandshark! That's a nice looking project you've got going there. Looking forward to following and learning from your progress. Are you planning on staining or painting your new top? It looks like the old top was black (-5)?
I'm just a hack, but the more time I spend on a guitar repair; the more I get attached to it; and the harder it becomes to sell! Anyway, OFC hospitality is like no other forum, I've experienced on the web. I hope you enjoy hanging around. BTW, when posting pics are you using the "Rich Text Editor"? There's a button down in the lower left of the screen that says, "Use Rich Text Editor". I've always found this easier than using straight HTML.
Look forward to following your thread! |
|
| |
|
Joined:
August 2016
Posts: 61
| Hi arumaku,
Thanks for the compliments. Tried the RTE. Still figuring it out. If you look at the pic of the top closely
you can see someone put a pickguard on it and removed the rosette. It is a 1115-1, which was a sunburst. They painted the top withblack rattle can spray. I scrqped the top a little after I removed it and found some of the original finish. I have not decided on a finish yet, but I work exclusively in Nitro lacquer, so it will be in that medium.
I have followed your posts as a guest before I joined. I think I am in good company on this site. Everybody has been very gracious and kind. That I have not found on some other guitar lovers sites. I live out in the desert in NW arizona, on solar and wind turbine. Not exactly a crowded area. LOL. So having a friendly web site like this is a real nice thing to be a part of.
Rick |
|
| |
|
Joined:
August 2016
Posts: 61
| Oops, sorry for the typo arumako. |
|
| |
|
Joined:
May 2008
Posts: 1553
Location: Indiana | Great job sandshark. Look forward to your updates. |
|
| |
|
Joined:
August 2016
Posts: 61
| Thanks Jonmark.
Just came in from the shop where I was working on the O. Had my magnifiers on and noticed the model number is 1615-1 All along i was under the impression it was a 1115-1 (old man eyes) which I was always a little concerned since the 1115-1 was an acoustic Pacemaker. Makes more sense being a 1615-1 since that was the acoustic/electric version. I was wary that someone had modified a 1115. Now I am really happy it is an original a/e. |
|
| |
|
Joined:
August 2016
Posts: 61
| Good morning. Added a few pics to the album.
While I was waiting for the top halves to set up,
I was taking a close look at the old top. I have been inside my share of Ovations in the past, and
I am confident this is the original top,but this was one of the saddest examples of production quality?
from old Ovation.
Adhesive all over and some poor brace joints. If I did this type of work on my Sandshark guitars
I make, I would be laughed out of the room. Such is the achilles heel of mass production.
Anyway, I use a 3/4"piece of granite counter-top for joining my top halves. Really smooth and flat.
Easy to stow away after I am done. Joining the top pieces isn't rocket science. A nice square
edge on each piece, no gaps. A good joint should only require enough pressure to firmly
hold the pieces together. I am sure others have addressed this all before, so I will hold off on
excessive pontification.
Have a fun day.
Rick
Edited by sandshark 2016-09-18 11:16 AM
|
|
| |
|
Joined:
December 2004
Posts: 556
Location: Denmark | sandshark - 2016-09-17 6:14 PM
Adhesive all over and some poor brace joints ... Such is the achilles heel of mass production.
This has been seen ... From the pictures/videos from the production lines that I have seen - including some relatively recent - I don't get the impression that they use(d) the best dosing tools when applying the Epoxy glue. In that situation I would also prefer rather a little more than a little less. |
|
| |
|
Joined:
June 2012
Posts: 2303
Location: Lake Forest, CA | sandshark - 2016-09-18 9:14 AM
I was taking a close look at the old top. I have been inside my share of Ovations in the past, and
I am confident this is the original top,but this was one of the saddest examples of production quality?
from old Ovation.
Adhesive all over and some poor brace joints. If I did this type of work on my Sandshark guitars
I make, I would be laughed out of the room. Such is the achilles heel of mass production.
Hi Rick,
You've got to remember that at that time Ovation was making in excess of 500 guitars per week. As you note, there's a big difference between custom guitars built one-at-a-time vs. building 100 guitars per day.
Dan |
|
| |
|
Joined:
August 2016
Posts: 61
| Added a few pics of the rosette I have made for the Pacemaker .Mahogany wedges will be darker after the lacquer is on. |
|
| |
|
Joined:
May 2008
Posts: 1553
Location: Indiana | Like the rosette. Course I love mahogany......
Edited by Jonmark Stone 2016-09-21 8:03 PM
|
|
| |
|
Joined:
March 2007
Posts: 698
Location: Cork, Ireland | So thats what mine looks like inside. (1979 1615) |
|
| |
|
Joined:
August 2016
Posts: 61
| Hi all.
Posted some new pics in my album. jonmark thanks for the compliment on the rosette.
Routed for the binding completed and will be doing the purfling routing shortly. |
|
| |
|
Joined:
October 2012
Posts: 1018
Location: Yokohama, Japan | sandshark - 2016-09-29 1:06 AM
Hi all.
Posted some new pics in my album. jonmark thanks for the compliment on the rosette.
Routed for the binding completed and will be doing the purfling routing shortly.
Great Job Sandshark! Going ahead and posting your pics in the thread, hope you don't mind...wanted to ask a few questions...The rosette is looking awesome. Are you planning on routing a slot for the rosette for a flush fit? 
To glue the top to the bowl...bicycle tubing? How do those work? 
Finally, what kind of material did you use for bracing? Looks a bit unusual? 
Very clean work, by the way. It's a great privilege to learn from real luthiers and experienced tradesmen like you here on the OFC. Thanks for sharing your journey! |
|
| |
|
Joined:
August 2016
Posts: 61
| Hi arumako,
I appreciate you moving my pics to the thread.
Also thanks for your kind words on my work. I will be gluing the rosette to the top rather than routing
it in. Keeping with the fairly standard way of the Ovation rosette attachment. That added a little strength to the tops around the sound hole. The rubber for holding the body down while the top set is an auto tire inner tube. I have used it for years, even though it is a little old school clamping style. I do use other ways on acoustic builds also, but this worked great for the round Ovation body. A lot cheaper than a set of clamps too!!
I tweaked the braces just a bit from the original. They are cut from a nice piece of red spruce, which is a bit stiffer than sitka. I increased the fan braces thickness by .020 from the originals and also the main cross brace. Red spruce was a widely used top wood decades ago because of it's clarity and stiffness, but got in pretty short supply because of over logging.
I used a maple bridge plate, the original was spruce. The sound hole plate braces are cut so the grain runs at an angle to the top grain, adding a little extra strength against warping. Even though I made some personal changes to the braces, I stayed with the original lay-out.
Edited by sandshark 2016-09-30 12:08 PM
|
|
| |
|
Joined:
August 2016
Posts: 61
| On the making of the tire tube clamp set-up. I cut the tire in one continuous cut around the circumference about 2" wide. Then start the wrap in the center of the back, pressing down firmly on the back. Wrap a few times in the narrow part of the waist, then wrap in a criss-cross pattern. Viola! Not my invention. This has been around for as long as I can remember. |
|
| |
|
Joined:
June 2012
Posts: 2303
Location: Lake Forest, CA | Nice job, Rick.
I'm looking forward to seeing more progress pics and the final result. |
|
| |
|
Joined:
August 2016
Posts: 61
| Thanks Dan. I have been following your two fer' thread. Looks fun.
Posted a few more pics of the purfling/binding progress.
Went with something simple and in my stock.
This project was an attempt to use existing stock without buying any new material
other than a new saddle top. So far so good.
|
|
| |
|
Joined:
July 2013
Posts: 98
Location: Des Moines, Iowa | I'm afraid all I can offer is a... WOW! AWESOME work and I love the custom rosette. I'd love to hang out and just watch over your shoulder for a few... years. Even if you don't make a big profit from selling it there's got to be a real sense of satisfaction in bringing something like this back from the dead and giving it a whole new life AND look.
THANKS for posting the project photos. I can see that the gallery offers others projects, too. Complete with 27 - 8x10 color glossy photos with circles and arrows and a paragraph on the back of each... wait, that was something else. Thanks to all who have and do share their fine work with the group. |
|
| |
|
Joined:
August 2016
Posts: 61
| Thanks for the compliment SLBoy. Binding is done, getting ready to start the finish application.
I needed a new saddle for it, so I called Ovation and left a message for John Budny (customer service). He called me back
in a little while. Wow, great guy. Sent me a goodie bag with saddles and shims, no charge, even though I offered to pay for it.
If he represents the way dwdrums is going to handle their Ovation customers, I will all be in total love with the mothership.
I am impressed.!!! |
|
| |
|
Joined:
November 2002
Posts: 3603
Location: Pacific Northwest Inland Empire | No changes there. The have ALWAYS had the best customer service. We are truly blessed. |
|
| |
|
Joined:
May 2011
Posts: 751
Location: Muenster/Germany | Any news about the 12string? Too little 12string topics here... |
|
| |
|
Joined:
August 2016
Posts: 61
| Added 2 new photos to my album. Have had to work on a few household projects. Finally getting back to
the Pacemaker. Applied the vinyl sealer coat and ready for a scuff sanding.
Will re-tape the bridge and rosette areas and start on the nitro lacquer coats. I will get the surface totally grain depression free with the lacquer undercoats and the apply the color coats. Haven't decided
on a color scheme yet. I am going to go with a solid color for sure. Might do a sunburst to at least honor the
original model dash number.
Rick
" If you have to ask me why I have so many guitars, you wouldn't understand the answer"
|
|
| |
|
Joined:
August 2016
Posts: 61
| Hi everyone,
Happy Thanksgiving. Posted 2 pics in my album. All done with the top finish. Bridge and rosette are on.
All that is left is to clean up the bowl body edge where it mates to the binding. A little filler and black paint and done.
I got this Ovation at a music store in Newport, Oregon in August called " Red Lotus Music". So, I made it red as a nod to the store. Found it in the parts guitar area. Now it has a new life.
Probably string it up and try her out next week.
Yee Haa.
Rick |
|
| |
|
Joined:
June 2012
Posts: 2303
Location: Lake Forest, CA | Nice job, Rick. I'm looking forward to hearing reports of how it sounds. |
|
| |
|
Joined:
August 2016
Posts: 61
| Thanks Dan. Kudos to you and your recent work on the two top jobs. Do you sell most of your Ovation
projects? I have a hard time selling my Ovation projects because of an overly emotional affection for them.
Anyway, I will be getting a new arrival of a real sad Ovation from ebay soon. Wanted the vintage tan case it comes with, (for this 12 string) and the guitar it comes with is really a mess. Looks like the fretboard was cut. And has white filler body work on the bowl. Top is off, looks unusable. Will wait to make a decision on what to do with it when I get it.
Anybody feel free to transfer my latest album pics to this thread if you want, I would appreciate it. Still failing at doing it on my own.
Rick |
|
| |
|
Joined:
June 2012
Posts: 2303
Location: Lake Forest, CA | sandshark - 2016-11-25 8:43 AM
Thanks Dan. Kudos to you and your recent work on the two top jobs. Do you sell most of your Ovation
projects? I have a hard time selling my Ovation projects because of an overly emotional affection for them.
Anyway, I will be getting a new arrival of a real sad Ovation from ebay soon. Wanted the vintage tan case it comes with, (for this 12 string) and the guitar it comes with is really a mess. Looks like the fretboard was cut. And has white filler body work on the bowl. Top is off, looks unusable. Will wait to make a decision on what to do with it when I get it.
Anybody feel free to transfer my latest album pics to this thread if you want, I would appreciate it. Still failing at doing it on my own.
Rick The 1111 and 1717 are only the 5th and 6th Ovations I've re-topped. The first one got sold recently. The second one, Jay's 1967 Balladeer was the first one I did using torrefied spruce. I'm keeping the 1978 1617-4, also torrefied top. After that was Paul's 1113, torrefied Adi top. Which brings us to these two. I did acquire these with the intention of selling them, basically building them on spec. Be sure to post pics of your next project. I enjoy reading about and seeing others' work as much as they do mine. Rather than simply post the pics for you, here's a quick 1-2-3 of how to post them. 1. Get the web location of the file. (URL)
In your case, you would go to the album, then right click on the image. This will bring up a dialog box. Click on the Copy Image Location selection. 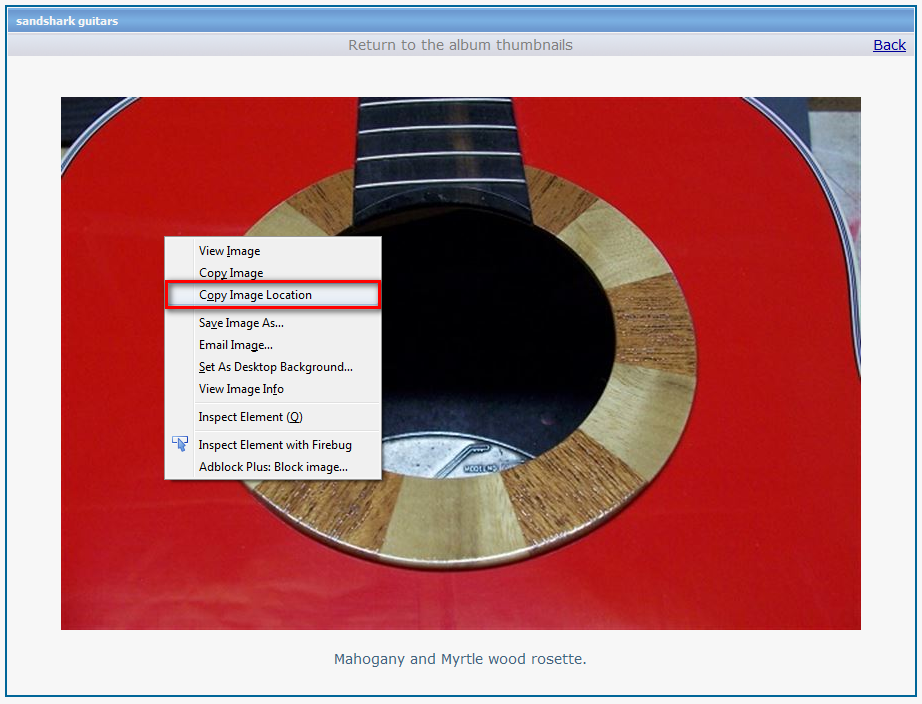
2. Select Rich Text Editor.
Go to the thread that you want to insert an image. Either click on the Reply or Quote button. Then, click on the Rich Text Editor button. 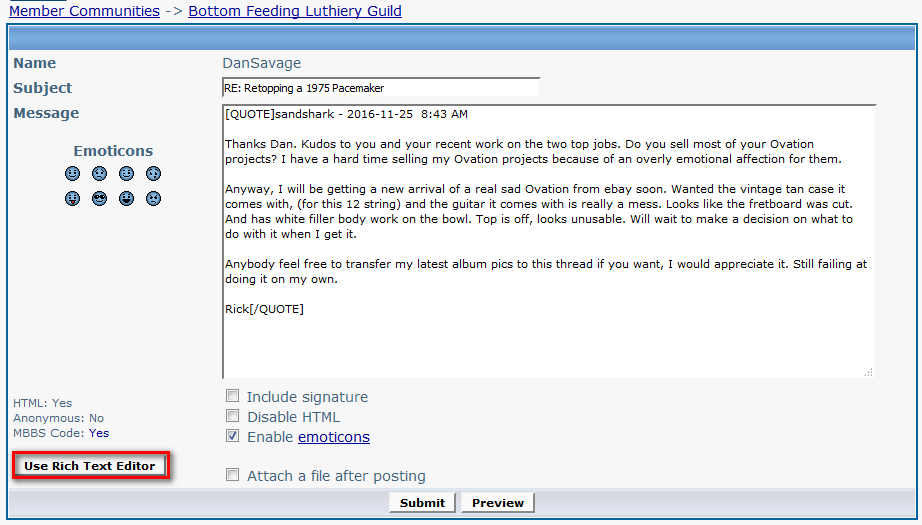
3. Insert the image.
Move your cursor to the area in the text where you want to insert the image. Click on the Insert/Edit Image icon at the top of the editor window. This will bring up a dialog box. 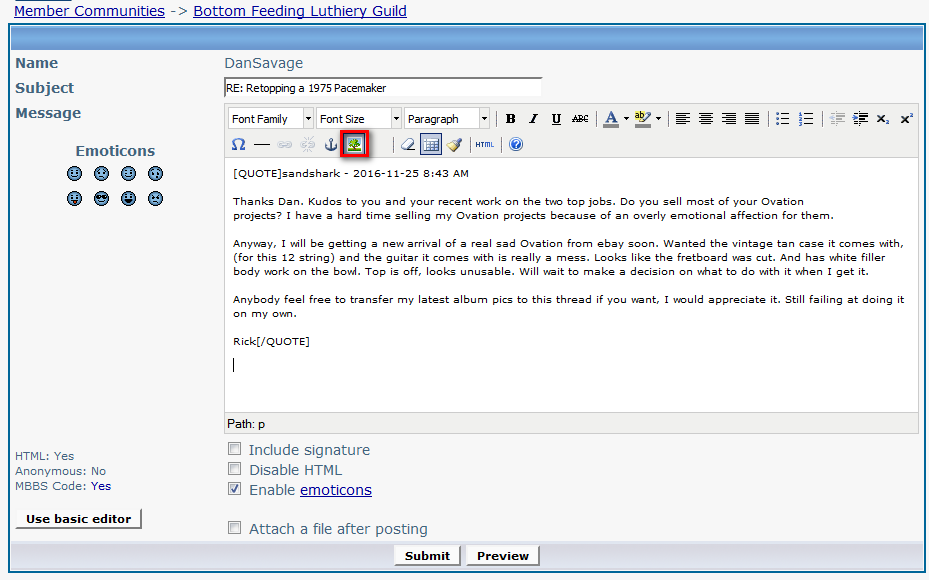
Click on the Image URL text box and paste the image location you copied above. Then, click on the Insert button. 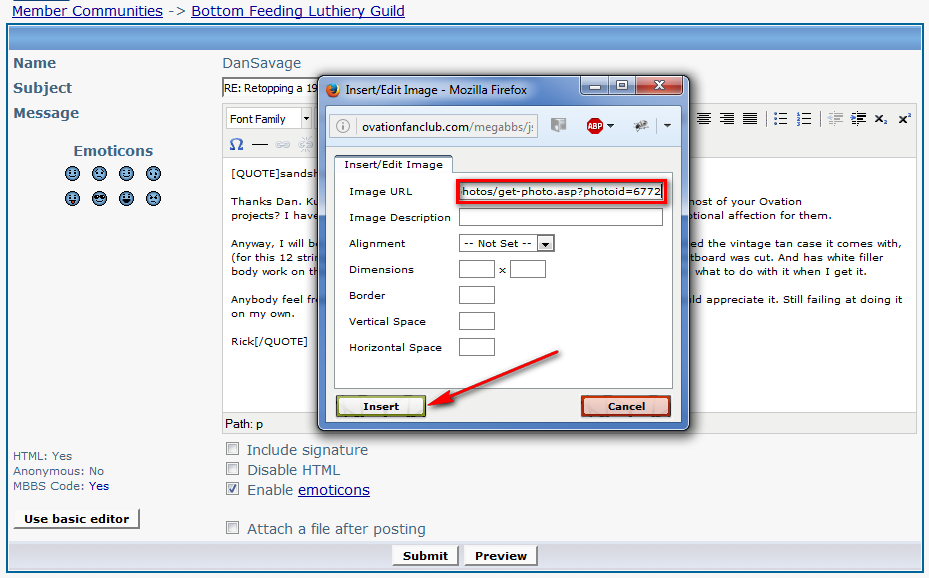
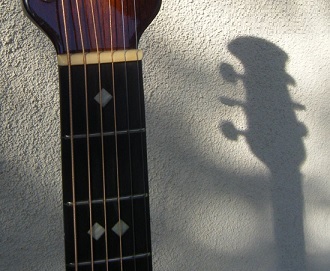
These were the exact steps I used to insert your image below. Give it a try. 
Edited by DanSavage 2016-11-25 1:47 PM
|
|
| |
|
Joined:
August 2016
Posts: 61
| 
OK, got it this far. How did you make it bigger?
Thanks for your help.
Rick
Edited by sandshark 2016-11-25 6:25 PM
|
|
| |
|
Joined:
August 2016
Posts: 61
| 
|
|
| |
|
Joined:
September 2006
Posts: 10777
Location: Keepin' It Weird in Portland, OR | I just copied image location and put it in the space, and clicked "insert" and this is how it came out.
|
|
| |
|
Joined:
August 2016
Posts: 61
| Yee haa, figured it out. Thank you, Mr.Savage.! May all your guitars stay in tune.
Rick |
|
| |
|
Joined:
August 2016
Posts: 61
| Thanks OMArthur. I needed to isolate the image from my album by double clicking and then I could do the image address prompt. You guys are awesome.
Rick |
|
| |
|
Joined:
August 2016
Posts: 61
| OK, so you guys have created a monster now. I will probably be a picture posting maniac.
|
|
| |
|
Joined:
August 2016
Posts: 61
| 
|
|
| |
|
Joined:
August 2016
Posts: 61
| 
|
|
| |
|
Joined:
August 2016
Posts: 61
| 
|
|
| |
|
Joined:
August 2016
Posts: 61
| Just got done with a 45 minute playing session. I love my new voice! Yes it said that. LOL
Waiting for a new saddle pickup and truss rod cover. Great intonation. Now I will let it set for a while under tension. Tuned it a half step down for break in.
Will do a final re-crown and polish of the frets when I take it down for the new saddle and electronics installation. |
|
| |
|
Joined:
June 2012
Posts: 2303
Location: Lake Forest, CA | It turned out nice, Rick. |
|
| |
|
Joined:
February 2016
Posts: 1770
Location: When?? | Very, very nice!! |
|
| |
|
Joined:
August 2016
Posts: 61
| Thanks for the compliments gentlemen. Gonna keep this one. Always lusted after red corvettes. Closest I will get. |
|
| |
|
Joined:
October 2012
Posts: 1018
Location: Yokohama, Japan | Wow! Just a beautiful job sandshark! Thanks for sharing your journey! When she settles, take a video and share her voice with us too! Please keep sharing your projects. It is such a privilege to learn from pro's like you and Dan! Amazing! |
|
| |
|
Joined:
August 2016
Posts: 61
| Thank you arumako. You all are very generous with your compliments. |
|
| |
