| The Ovation Fan Club | ||
| ||
| Random quote: "One good thing about music, when it hits you, you feel no pain." - Bob Marley |
 1990 Elite 1868 Project 1990 Elite 1868 Project
| View previous thread :: View next thread | |
| Member Communities -> Bottom Feeding Luthiery Guild | Message format | |
| DanSavage |
| ||
Joined: June 2012 Posts: 2332 Location: Pueblo West, CO | arumako - 2017-05-03 4:42 PM Oops, I looked back through the archives and it was your '78 1617 Legend Rebuild from 1.5 years ago. Man, this site is just filled with useful inspiring information for anybody who wants to take a shot at guitar repairs or builds! That was also sanded to the standard 10", I think.. I was thinking about this pic, remember that? I see something like this and in my naivity, I think...who needs oil! Look at that thing shine. Right now, after going up to 1000 grit, my fret board looks like this too. But then no fret board on a guitar that's being used ever looks this clean! Yep. I remember it well. I think I took it down to 800 grit. This looks really nice from a shallow angle like what's seen in the photo. But, when viewed straight on, it looks dry. The oil gives the bare wood a rich, lustrous look. arumako - 2017-05-03 4:42 PM Cool. thanks for the useful links Dan. Those are really cool tools. Always been using my trusty standard refret saw, but that thing is perfect! I've got a friends Yamaha that needs a fret job, but it has binding, and I was wondering how I'll ever really get the fret slots clean. I don't think I've ever seen this tool in any of your projects...maybe I just missed it! Gotta use the right tools to get optimum results! Gonna get me one of these today...kinda obvious question, but you never know...so, I'm guessing fret tang size determines the tool size? No, you're correct. I've never posted pics of these tools. I don't use the refret saw all that much. I do use the fret slot cleaning tool, though. The hooked shape works really well for getting into the corners next to the binding. Given the choice, I'd pick the fret slot cleaning tool over the refret saw. Like I say, I hardly use the saw. I'll drag the tool until the tip reaches the corner, then rock (roll?) it to let the tip lift the gunk out of the slot. Nah, the fret cleaning tool is narrow enough to fit inside the Ovation fret slots. Since these are pretty much the only guitars I work on, that's all I care about. Also, when preparing the new frets, I remove enough of the fret tang so that it doesn't interfere with the binding as I'm installing the frets. Another tool I've used on every refret job is Stewmac's Fret Tang Nipper. This tool is worth every penny. | ||
| |||
| arumako |
| ||
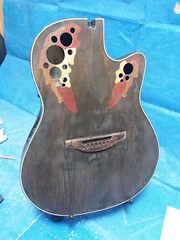
Joined: October 2012 Posts: 1080 Location: Yokohama, Japan | Thanks again for all the helpful tips Dan. Decided to give the project a few more hours and made some huge progress today. Started off with the easy stuff by filling the fret marker holes. I tried using my inlay filler, but it's a bit old and was not usable; so, I opted to use some automotive touch up paint. I had flat black available and its viscous enough to fill the gaps well and hardens pretty well because its polyurethane. Just put enough paint on the end of a toothpick to create a droplet, when the hole touches the paint it just sucks the paint in. Repeat until a bead shows up like so...
Then just sand it down. The flat black paint color was just a bit off...oh well, I don't think it will be too noticeable.
I also began my binding installation. Had to approach this a bit differently. Used a hair dryer to bend the plastic binding into general shape then the outter binding was CA'd to the bowl.
Then I inserted the rest of the binding/purfling in between...this is just a dry run...
Settled on a white black/white/black and gold (brass) trim...
Unfortunately, there are some big gaps between the binding and the edge of the sound board...
The sound board must have been just a tad bit off when I Hysoled the top back on to the bowl! Think I'm gonna need some pigmented wood filler to fill the gaps...oh well. Feels good to make some progress anyway. Gettin' closer! | ||
| |||
| DanSavage |
| ||
Joined: June 2012 Posts: 2332 Location: Pueblo West, CO | Nice job on the filling of the gaps on the inlays of the fretboard. If you haven't already glued the purfling, I'd add another thin strip to fill the gaps. When I glue the binding and purfling, it's done at the same time to minimize the gaps. The exception was the abalone purfling on the 1528. That demanded the purfling be glued first, then the binding outside of that in a separate step. How are you planning to get the brass strip level with the sound board? Are you going to use a dremel, cabinet scraper, sandpaper? | ||
| |||
| Love O Fair |
| ||
Joined: February 2016 Posts: 1849 Location: When?? | Arumako.. taking nice shape and no doubt going to be beautiful in the end. If I were trying to do that detail work with my goat hoof hands the gaps would have been big enough to make a whole other sound hole! Edited by Love O Fair 2017-05-05 11:36 AM | ||
| |||
| arumako |
| ||
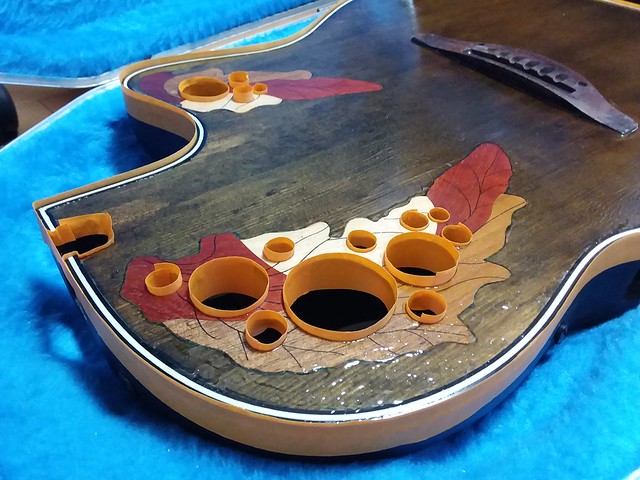
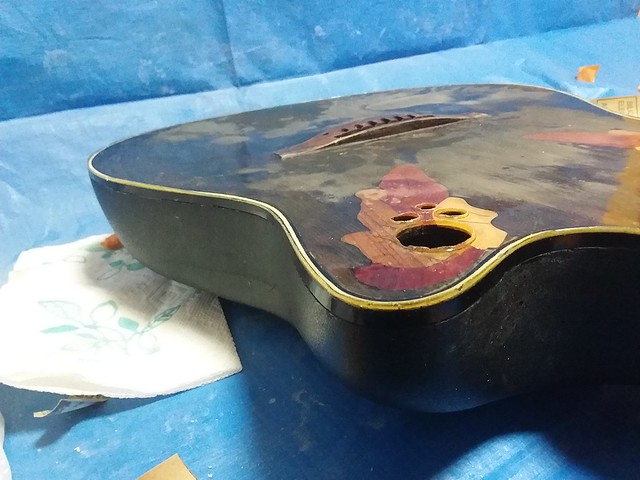
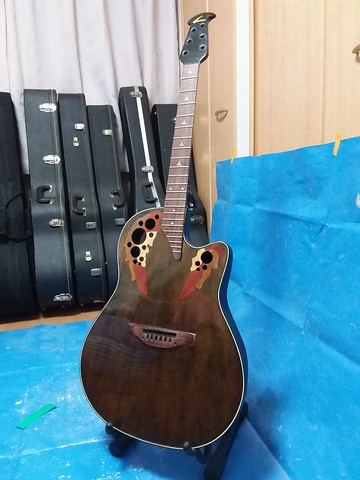
Joined: October 2012 Posts: 1080 Location: Yokohama, Japan | Okay...this baby has been on the shelf for over an year! My daughter has been playing my 97C, and she's learning really quickly. This Elite was originally for her until she lost interest. The other day as she was practicing she asked about this guitar. So, I started explaining about the difficulty of the brass binding, and how I was hoping to go with some difficult wood binding... she starts looking through my stash of wood and plastic binding, and says, "Plastic! Black/white/black, Dad..." Taped her up (the guitar, I mean...) for a dry run, and...
Hey, I like plastic b/w/b binding! Cool! Much easier than wood and brass! Doh!
This Elite is off the shelf and on the go... AGAIN! Glued the binding into position, and will start scraping the binding down this weekend. Looking for a 2018 finish! About time! Edited by arumako 2018-11-24 8:11 AM | ||
| |||
| tpa |
| ||
Joined: December 2004 Posts: 572 Location: Denmark | Reviving the project. Nice to see it back on track :-) | ||
| |||
| moody, p.i. |
| ||
Joined: March 2002 Posts: 15674 Location: SoCal | Just read thru this whole thread, like a novel. Really interesting. Looking forward to see how it comes out (find out who done it?)..... | ||
| |||
| arumako |
| ||
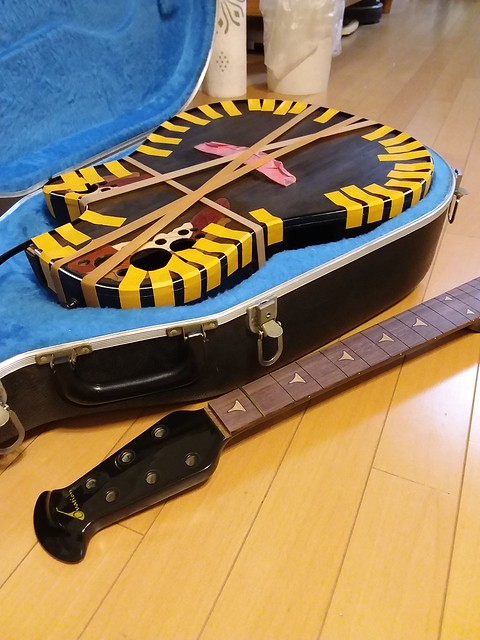
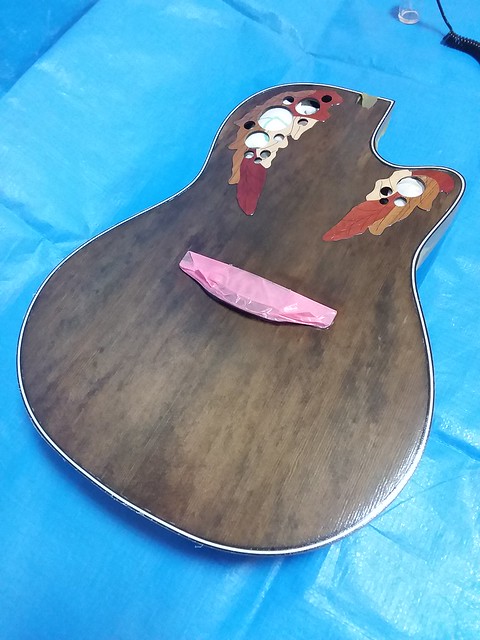
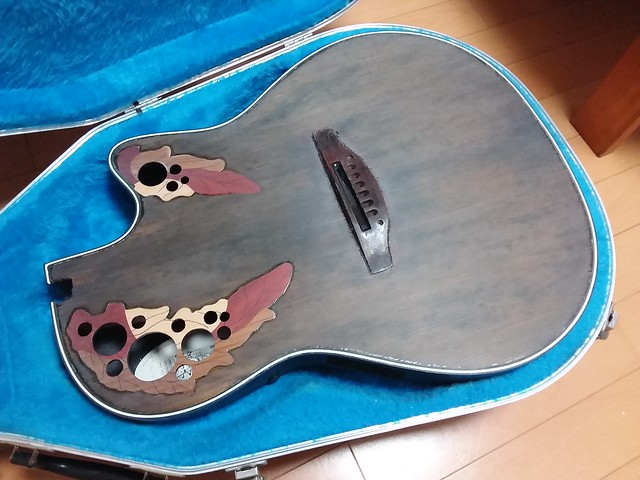
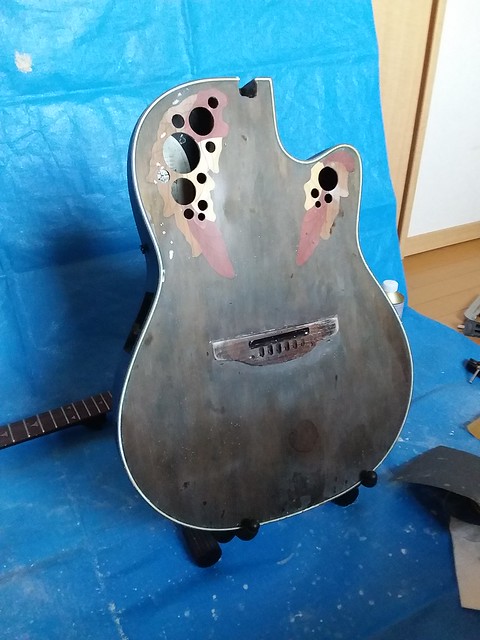
Joined: October 2012 Posts: 1080 Location: Yokohama, Japan | Thanks for reading through the entire thread moody, p.i. Throughout these 4 years, this project has taken a lot of twists and turns. Come to think of it, the whole thread kind of reflects my journey as a guitar repairman. From my mistaken bidding to my countless incorrect observations, the thread also reflects my deepening appreciation of these incredible instruments. Through the interesting and sometimes strange twists and turns, the OFC/BFLG was always helpful, informative and encouraging (thanks tpa, et. all!)!
Nothing you all haven't seen before, but because the assembly order is incorrect, the top needed to be covered with tape just in case my make shift scraper went astray. Oherwise it would have been an easy scrape, some overall sanding, "ebonizing" and finishing. In any case, when the scraping is done, I plan to use Z-Poxy's Finishing Resin (really dig this stuff) instead of a poly-finish. Should be an interesting December! Thanks for the encouragement BFLG! | ||
| |||
| DetlefMichel |
| ||
Joined: May 2011 Posts: 758 Location: Muenster/Germany | The colour of the top is absolutely stunning.Makes me feel like removing the clear coat from my old blonde 12string... | ||
| |||
| arumako |
| ||
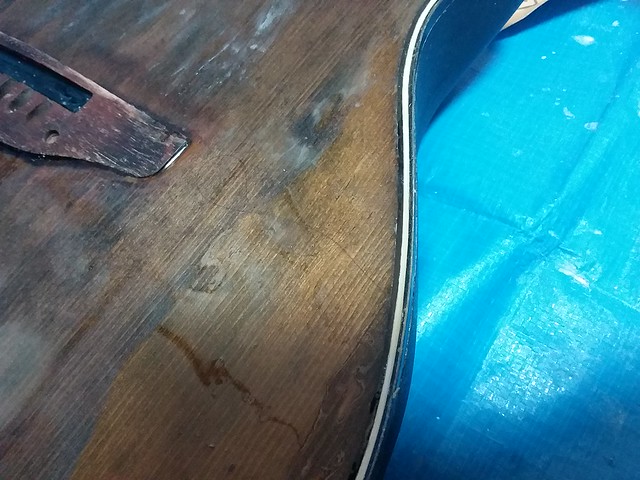
Joined: October 2012 Posts: 1080 Location: Yokohama, Japan | DetlefMichel - 2018-11-28 2:56 AM The colour of the top is absolutely stunning.Makes me feel like removing the clear coat from my old blonde 12string... Thanks DetlefMichel. Some people really dislike these stained finishes and the local reviews over here are pretty mixed, but I really really like the grainy coloring of spruce after "ebonizing". Getting really close to the end of the shaving/scraping process. 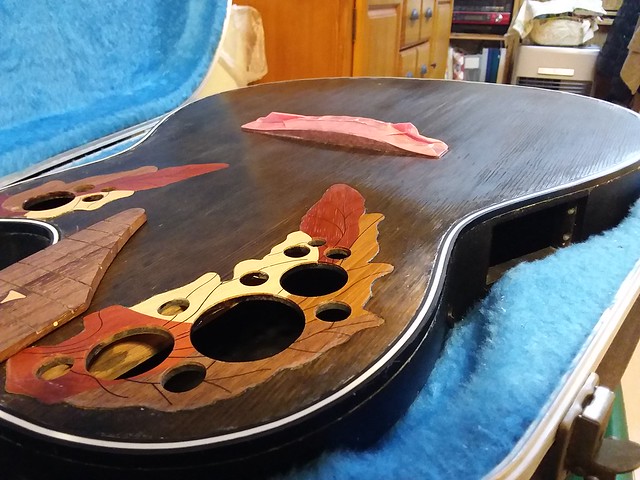 Will need a lot of concentration to get the wavy binding completely flat, but she's gonna be worth all the patience I can muster! Slow and steady... | ||
| |||
| arumako |
| ||
Joined: October 2012 Posts: 1080 Location: Yokohama, Japan | And continuing with the progress... all done with the scraping process, and down to leveling off the wavy binding. Using my edge sander to get the job done without jeopardizing the semi-finished guitar.
It's a really slow inefficient process, but the waves are really leveling nicely. The four coats of lacquer based sanding sealer are really protecting the ebonized top at this point. The small blemishes caused by my edge sander will only be lacquer deep. Additional thin coats of lacquer will melt right into the existing coats; and the lacquer will basically clean itself up. Once the edges are flattened, an additional coat of sanding sealer, then on to the Finishing Resin final coats. Still need to complete the fret job as well, but it's slowly getting there. Finishing this project sure would be a great way to close out the year! | ||
| |||
| arumako |
| ||
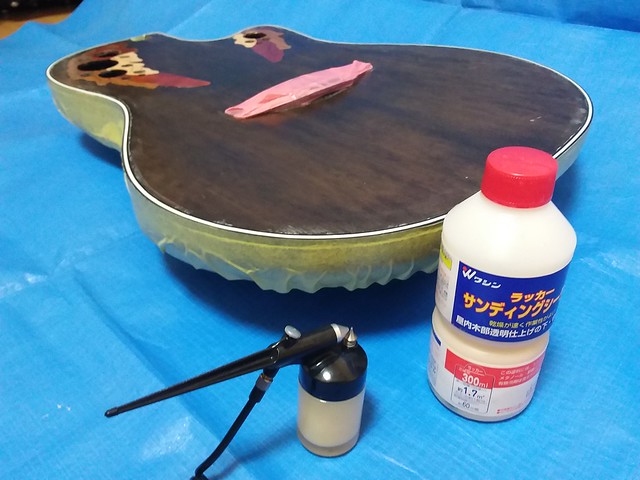
Joined: October 2012 Posts: 1080 Location: Yokohama, Japan | Finally got the binding leveled off, well to the best of my amateurish hands anyway. So now the sanding sealer coat needs to be thickened. Just using locally available nitrocellulose lacquer sanding sealer at this point. This stuff works well, but I wouldn't be too surprised if this stuff was just US product repackaged for the Japanese market. Using my trusty model spray gun to apply nice thin coats - one coat at a time...
This stuff dries pretty quickly; and after an hour, I can take some 400 grit sand paper to smooth things out. I'll end up using nearly all 300ml of this bottle (maybe 5 thin coats) before I go to the finishing resin. By then all the micro-surface irregularities will be completely leveled and filled. After two coats she's already starting to level and fill nicely.
Really important to keep these lacquer products warm as you work to prevent splattering. Sheesh, I just might get this thing done this time! Yes! | ||
| |||
| 2wheeldrummer |
| ||
Joined: February 2014 Posts: 714 Location: moline,illinois | That top is looking really beautiful love the way the grain showing keep up the good work!!! | ||
| |||
| DetlefMichel |
| ||
Joined: May 2011 Posts: 758 Location: Muenster/Germany | I love it, maybe you should use black tuning machines. | ||
| |||
| Love O Fair |
| ||
Joined: February 2016 Posts: 1849 Location: When?? | We've been watching that sound board go through what at times looked like a military boot camp obstacle course. All the rigors. But now.. oh, my.. that is one of the most beautifully unique finishes I've ever seen. I'm anxious to see the entire finished product in all its gleam! @Ken - >>>Looking for a 2018 finish! About time!<<< ...6...5...4...3...tick, tick, tick. | ||
| |||
| arumako |
| ||
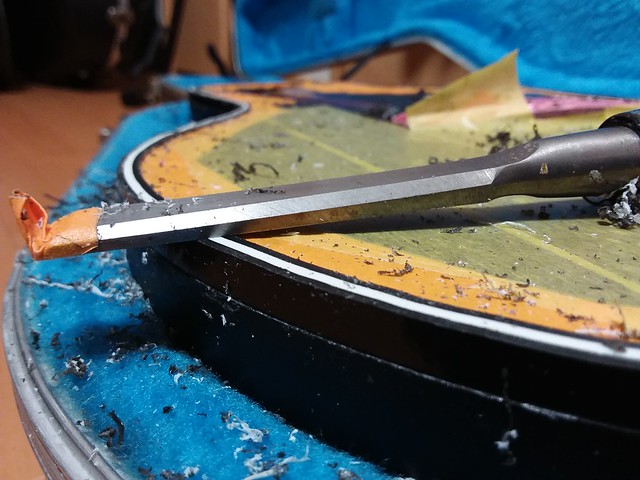
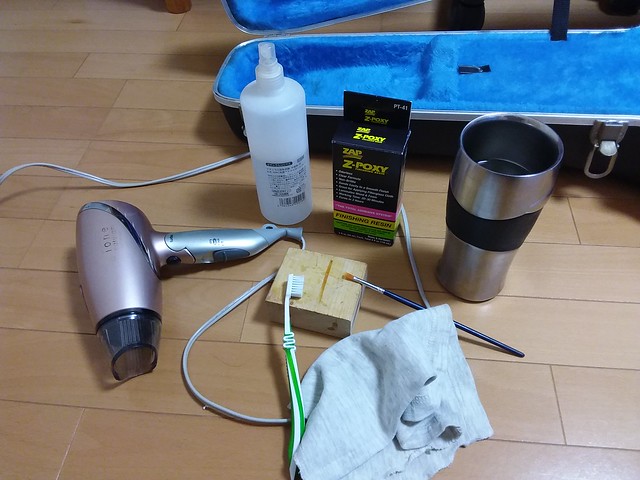
Joined: October 2012 Posts: 1080 Location: Yokohama, Japan | Love O Fair - 2018-12-27 7:03 AM I'm anxious to see the entire finished product in all its gleam! ...6...5...4...3...tick, tick, tick. Hey, thanks for all the encouraging comments everybody! It's already the 29th over here, and the pressure is definitely on! LOl! So, despite using a spray gun, and multiple thin coats (applying thin layers helps the consistency of the finish, but lacquer layers actually mesh into each other) the nitro-lacquer based sanding sealer finished up with the inevitable "orange peel" effect. Used the tools pictured below to prepare for the finishing resin.
The tooth brush is essential to clean edges and crevices after wet sanding is done. The clean soft cotton cloth wipes away the rest of the debris. The water sprayer has one drop of unscented dish washing fluid to provide some lubrication during the wet sanding process. The finishing resin components are warmed in the cup which is filled with one part boiling water and one part warm tap water. The hair dryer and brush will help to spread the finishing resin. First, the sanding sealer is wet sanded with 400 followed by 1,000 grit sand paper to eliminate the "orange peel" effect.
After thorough cleaning, the top was left to dry for 24 hours. Now onto the finishing resin. The epis and edges were taped up to create a reservoir for the finishing resin. Warming up the resin makes it more viscous and easier to work with. The resin was mixed and poured onto the top, but my estimation was way to conservative, and there wasn't enough to go all the way around. The resin gathered in thin blobs all over the top...
Oops, no need to panick... just need to prepare some more, but this time the proper amount was calculated. Grabbed the drier, brush, and expired credit card to distribute the resin... OH SH...eep Feces, calculation error! Too much resin... Ahhh, two hands not enough... "Daughter, oh daughter, please help Dad! Bring your hair drier... HURRY! Yikes, just about tanked the project (thank God for the 30 minute working time!), but I scooped out the excess resin while my daughter kept the surface warm...glad I was working on my blue sheet - what a mess! Still, my daughter helped me salvage the project. Whew!
3 hours to dry. Some touch up of areas that may have been missed, and I'm down to the final stages of wet sanding, polishing and buffing! Gotta finish up the frets, final assembly and adjustments. BUT I will RUSH no more! Oh man... goog night!
| ||
| |||
| jay |
| ||
Joined: January 2009 Posts: 1249 Location: Texas | Wow...I would have choked and it would have been my last project. So much work up to this point and you avoided what seems to have been a disastrous ending. I am as impressed with your save as I am with the beautiful body. Congrats!!!! | ||
| |||
| d'ovation |
| ||
Joined: December 2003 Posts: 852 Location: Canada | That was an exciting finishing run. Hopefully guitar will be complete next year. | ||
| |||
| Love O Fair |
| ||
Joined: February 2016 Posts: 1849 Location: When?? | For some reason I thought you had planned to leave it at a matte finish and just rub it out for grain highlighting. Not sure where I got that, but silly me. The gloss is fantastic! Glad you were able to duck into the phone booth and dawn your cape for the final moment's rescue. | ||
| |||
| arumako |
| ||
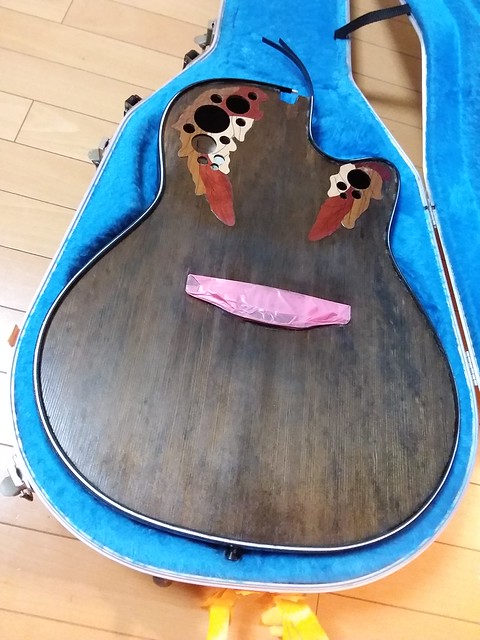
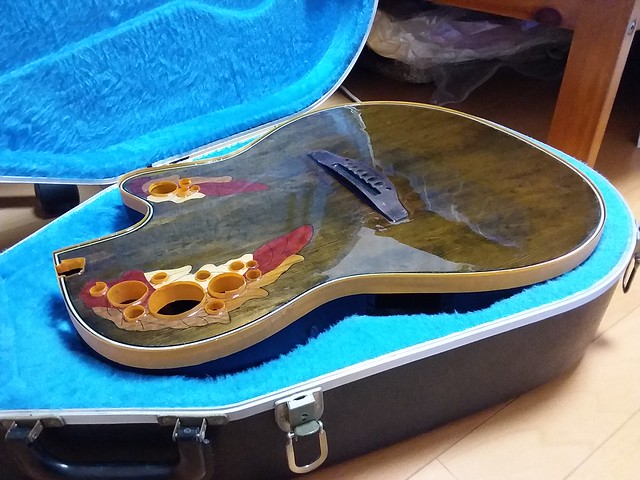
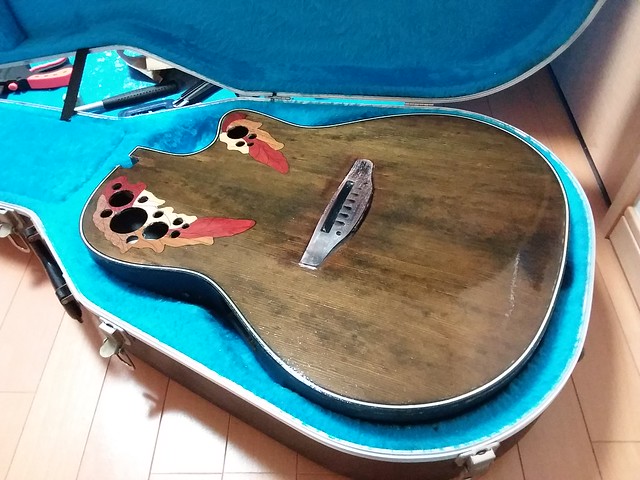
Joined: October 2012 Posts: 1080 Location: Yokohama, Japan | HAPPY NEW YEAR OFC/BFLG! So here's my 1868 all finished up! Just in time to ring in the New Year!
NOT! Well, this is as far as I got! I'm actually counting my blessings! I almost did choke with this one! When I poured my second "calculated" run of the finishing resin, I completely forgot to account for the finishing resin used in my first run! After my daughter helped me "save" the project; she said, "Dad your hands are shaking like crazy!" They really were shaking! After waiting 48 hours, (to calm the nerves as much as to let the resin cure), it was time to start the wet sanding process. Immediately noticed a battle scar from 48 hours before...
Do you see it? Just to the right of the bridge? Yeah, that one strand of hair! My daughter's (too long, dark and healthy to be mine, Lol). We were both beside ourselves in a mad rush to salvage the project that neither of us saw this! Crazy! We both examined the whole guitar carefully for air bubbles too! Oh well, this will sand out as the project nears completion. After removing the "reservoir tape", it's easy to see all the flashing built up all around the edges.
At this point, the final finish is right at 1mm thick. That gives me plenty of room to sand, polish and buff the finishing resin to a gleaming luster! Dissappointed that a 2018 finish was not realized, but this will be one of the first out of the shop in 2019! Meanwhile, hope you all have a fun and safe New Year celebration! May 2019 be a banner year for you all! Thanks for all the encouragement too! | ||
| |||
| FlySig |
| ||
Joined: October 2005 Posts: 4065 Location: Utah | Happy New Year, Aramako! This build has been quite an exciting adventure as a spectator. | ||
| |||
| arumako |
| ||
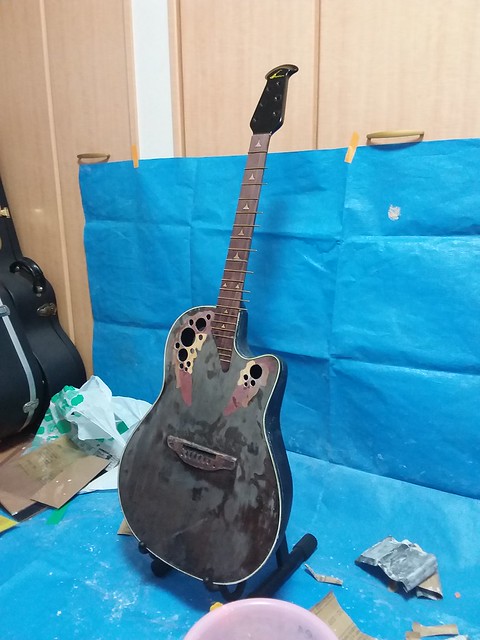
Joined: October 2012 Posts: 1080 Location: Yokohama, Japan | Thanks FlySig. It's been quite a nerve racking adventure for sure. Hope this thread helps folks to remember what not to do when re-building a valuable USA O! Along with my inexperience, one of the other "excitement" inducing features of this project (in retrospect) has been the fact that I've introduced too many experimental variables in one project. Ebonizing and routing the epis into the sound board, attempting an all epoxy finish, radiusing the fret board to 20 inches (instead of the 10 inch standard), and using Warwick's brass alloy frets... jeepers are these frets hard to work with! Had to resaw the fret slots wider and deeper (due to the change in fret board radius), and they were a bear to get seated properly. After wrestling with the frets, I finally got them filed down and dressed up...
The neck angle is absolutely perfect! Assuming disasters are avoided until completion, she should be a beauty with depth and clarity of voice. Just can't wait to finish her, string her up and take her for a spin! Getting really close! | ||
| |||
| Notalent |
| ||
Joined: September 2018 Posts: 11 | Arumako, It is the persistence, talent and vision exemplified in this build that is so inspiring to all of us arm chair viewers. You improved a great guitar, in a manner that elevated the guitar as an example of ‘what can be’...most would have simply walked away, but the talent of you and others on this forum is always amazing. Respectfully, Notalent | ||
| |||
| arumako |
| ||
Joined: October 2012 Posts: 1080 Location: Yokohama, Japan | Thanks for the generous comment, Notalent! The OFC/BFLG really gave me encouragement and direction every time I felt like walking away. This, and nearly all of my projects, would have never made it to completion had it not been for the patient inspiration shared by the members here. Speaking of "completion", this 1868 is really coming down to the wire... Having avoided a major disaster, I've found it better for my blood pressure to slow down; and man, have I slowed down! The epoxy finish was leveled with a 220 grit "wet" sand. My daughters healthy strand of hair was happily eliminated by this step...
As the pic clearly shows, there were still small dips in the final finish, so three thin epoxy coats were applied using an expired credit card. The thin credit card application of epoxy prevents the formation of tiny air bubbles (which I found to be a risk when working with this Finishing Resin product); however the credit card or window squeegy application leaves very subtle streaks that will need to be sanded away later. The glossy finish in the pic below is deceiving.
After the standard 24 hour wait, the subtle streaks were wet sanded with 1000 grit sand paper and wiped down with a slightly damp cloth. After another 24 hours, the whole top was lightly dry sanded with 1000 grit paper. This ensures theres no build up of wet epoxy residue in any micro-air bubbles if they exist. Finally, the whole top is cleaned with naptha (lighter fluid). The left photo was taken after cleaning with naptha, and the right photo was taken after my first pass using 7 micron polishing compound...
Stayed with the 7 micron polishing compound... wax on, wax off; wax on, wax off; wax on and on and on....
Final polishing is still going to take quite a bit of time. Need to go through 1 micron, 0.2 micron, and plain polishing compound as a substitute for going through a buffer. While the Z-Poxy's Finishing Resin is great for touching up finish cracks and dings, I've found it a bit difficult to work with as a complete finishing solution. Of course, my application method leaves much to be desired, but having worked with lacquer, poly, and shellac (French polish); epoxy would be my least favorite finishing solution. However, it's more durable than lacquer (not as strong as poly), and ounce for ounce, I think it's the least expensive of the finishing methods I've tried to date. It would have been much easier if the Finishing Resin could have been sprayed. Still, when all is said and done, it will provide protection and beauty for years. Still have a few more steps to go but getting really close! Don't blow it, Ken! Edited by arumako 2019-01-11 12:39 PM | ||
| |||
| 2wheeldrummer |
| ||
Joined: February 2014 Posts: 714 Location: moline,illinois | Looking really pretty,that's going to be one shiny baby when your done,perseverance and patience will pay off in the end!!!! | ||
| |||


| Jump to page : 1 2 3 4 5 6 Now viewing page 4 [25 messages per page] |
| Search this forum Printer friendly version E-mail a link to this thread |
| This message board and website is not sponsored or affiliated with Ovation® Guitars in any way. | |
| (Delete all cookies set by this site) | |