| The Ovation Fan Club | ||
| ||
| Random quote: “Music is a moral law. It gives soul to the universe, wings to the mind, flight to the imagination, and charm and gaiety to life and to everything.” -Plato |
 1978 1617 Legend Rebuild... 1978 1617 Legend Rebuild...
| View previous thread :: View next thread | |
| Member Communities -> Bottom Feeding Luthiery Guild | Message format | |
| T.R. |
| ||
Joined: May 2015 Posts: 186 Location: Glendora, CA | I agree with DetlefMichel & standing. Dan you are inspiring and a true educator!! | ||
| |||
| Explorer |
| ||
Joined: December 2015 Posts: 41 | Dan, though I've been lurking for quite a while, I have always found the rebuild topics from you and arumako to be awe-inspiring. | ||
| |||
| DanSavage |
| ||
Joined: June 2012 Posts: 2303 Location: Lake Forest, CA | DetlefMichel - 2016-01-08 3:47 AM Your "re"-builds appear to me to be "improved"-builds..... Thanks! This gets back to my model airplane building days where I would be building a kit designed by someone else and found structures or construction features that I didn't like and so I changed the design to suit my own preferences or in ways that I knew to be better. In fact, after a while it became more work to change the design of someone else so I started designing my own models that didn't have the shortcomings I found in others' kits and stopped entirely building other peoples' designs. One thing about model airplane builders is that they want to see how a model is built in excruciating detail. If anyone's interested, I'd be happy to post links to the construction guides for the models I've designed. They're quite illustrative of the amount of detail I go into on the build threads here on the OFC. Dan Edited by DanSavage 2016-01-11 10:18 PM | ||
| |||
| BCam |
| ||
Joined: October 2014 Posts: 268 | Can you give us some info on how you find your project guitars? | ||
| |||
| DanSavage |
| ||
Joined: June 2012 Posts: 2303 Location: Lake Forest, CA | My first one, the 1619 CL was bought off the OFC for sale section. It was an Ovation factory engineering mule. Jay's 1967 Balladeer guitar was, well, his. He shipped it to me. I bought this one off eBay. Usually I hit eBay every day and do a search for 'vintage ovation guitar', 'ovation guitar part' and 'ovation guitar project'. I also hit CraigsList looking for guitars. I almost picked up a 197x Balladeer that needed a new top, but the seller never responded back. | ||
| |||
| BanjoJ |
| ||
Joined: September 2012 Posts: 809 Location: Thredbo, NSW, Australia | Your projects have inspired me Dan, so I check Aussie eBay and Gumtree every day looking for a project Ovation. I got my 1614 Folklore from Gumtree that had both main x braces broken at the join. I repaired that and two years on it's still going fine. Unfortunately I didn't get enough photos to document it fully. Maybe I should try with the photos that I have? | ||
| |||
| Mark in Boise |
| ||
Joined: March 2005 Posts: 12750 Location: Boise, Idaho | I totally forgot that my pristine 1614 came to me with a broken brace where the hole for the saddle was drilled right through it. It had a bad buzz, but a little glue and a makeshift clamp seemed to have fixed it for about 10 years so far. That was my kind of project. Buy problem guitar cheap. Fix problem easily and cheaply. I wish I could find more of those. Dan's require a lot more skill and patience. | ||
| |||
| DanSavage |
| ||
Joined: June 2012 Posts: 2303 Location: Lake Forest, CA | BanjoJ - 2016-01-13 2:26 PM Your projects have inspired me Dan, so I check Aussie eBay and Gumtree every day looking for a project Ovation. I got my 1614 Folklore from Gumtree that had both main x braces broken at the join. I repaired that and two years on it's still going fine. Unfortunately I didn't get enough photos to document it fully. Maybe I should try with the photos that I have? Thanks! Yeah, guitar repairs aren't really all that hard, so there's no reason to be intimidated. While some people are hesitant to work on their guitar because of the money they spent, consider the model airplane flyer. Some of those folks will spend up to $10,000 or more on a model, then fling it into the air which sometimes results in the Gods smiting them out of the sky. Absolutely! I'd love to see the pics you've got of your repair. | ||
| |||
| DanSavage |
| ||
Joined: June 2012 Posts: 2303 Location: Lake Forest, CA | Mark in Boise - 2016-01-13 3:16 PM I totally forgot that my pristine 1614 came to me with a broken brace where the hole for the saddle was drilled right through it. It had a bad buzz, but a little glue and a makeshift clamp seemed to have fixed it for about 10 years so far. That was my kind of project. Buy problem guitar cheap. Fix problem easily and cheaply. I wish I could find more of those. Dan's require a lot more skill and patience. The guitar repairs you see me doing are nothing compared to building a balsa and plywood model airplane with, literally, a couple of hundred parts. Cheap is why I was hoping to get my hands on the 197x Balladeer. It needed a new top, but the guy was only asking $45 for it. I was a little disappointed he didn't return my calls or emails. But, I figured in the end, I'd save the money for my wood-backed O knock-off. | ||
| |||
| DanSavage |
| ||
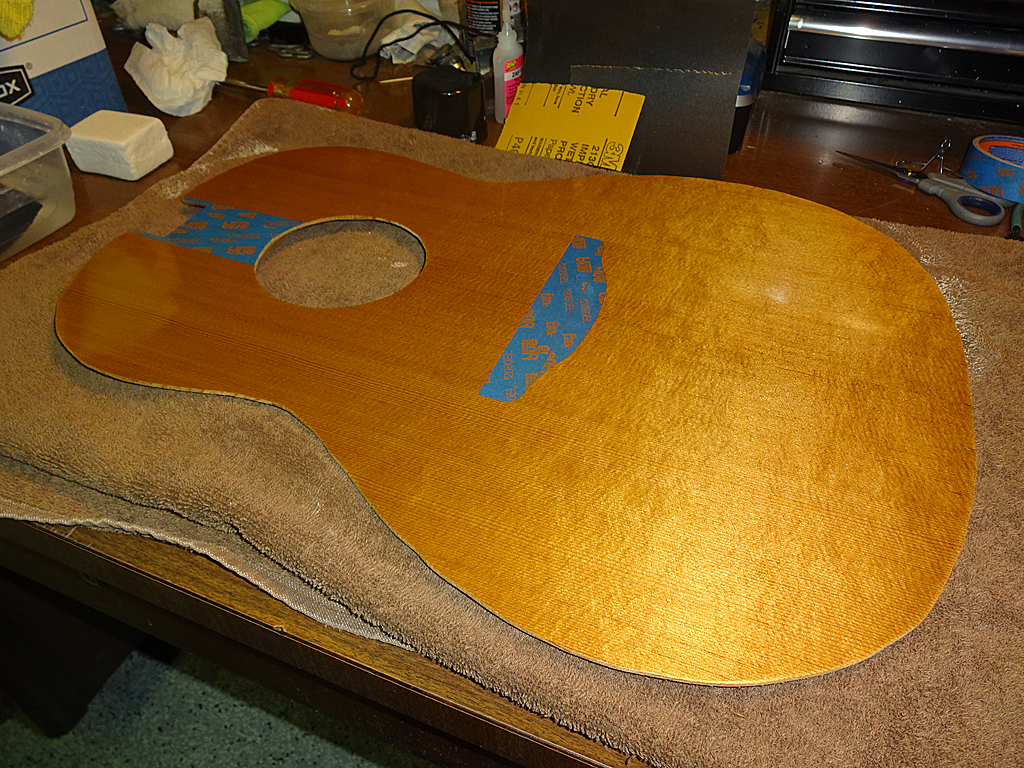
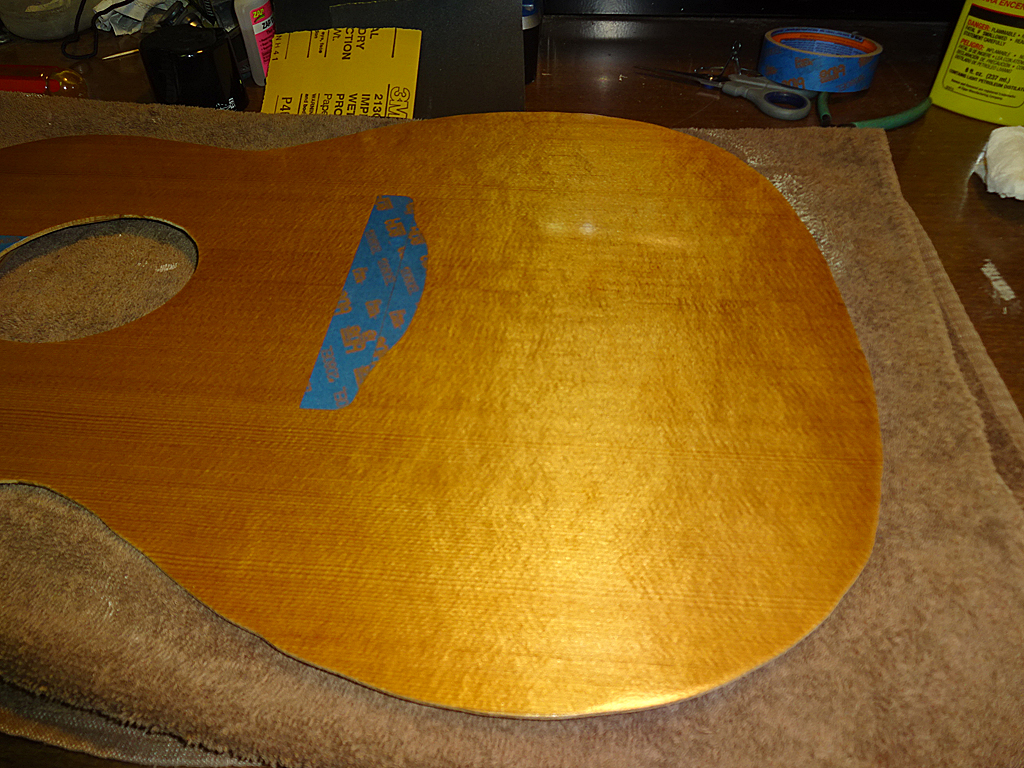
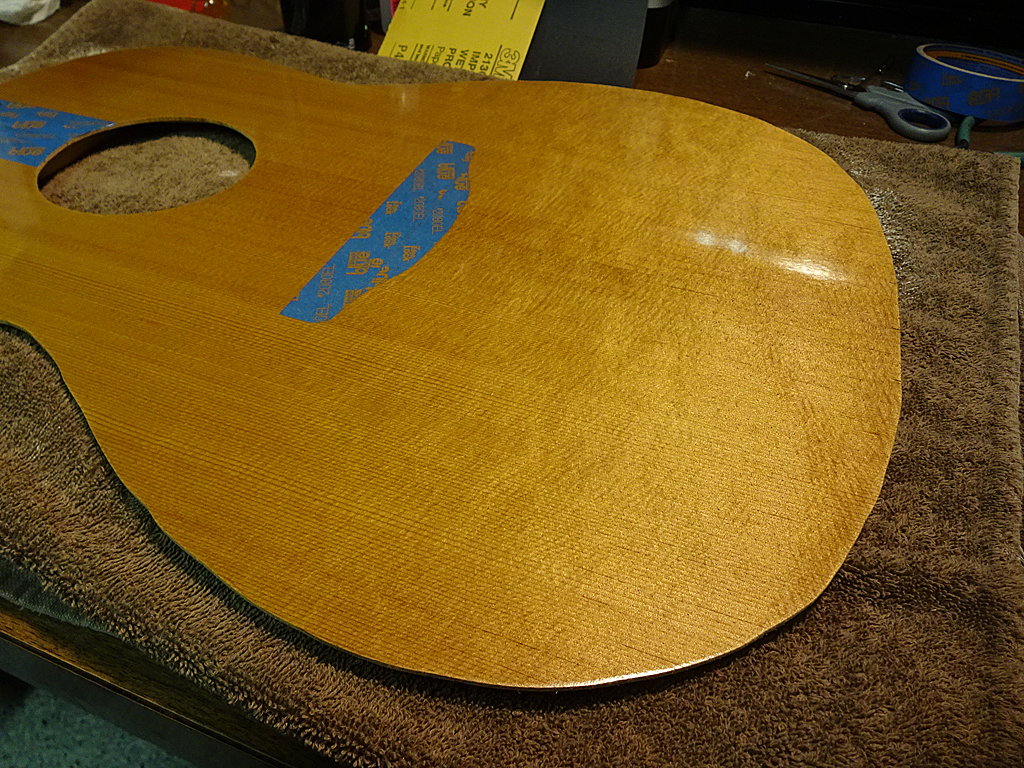
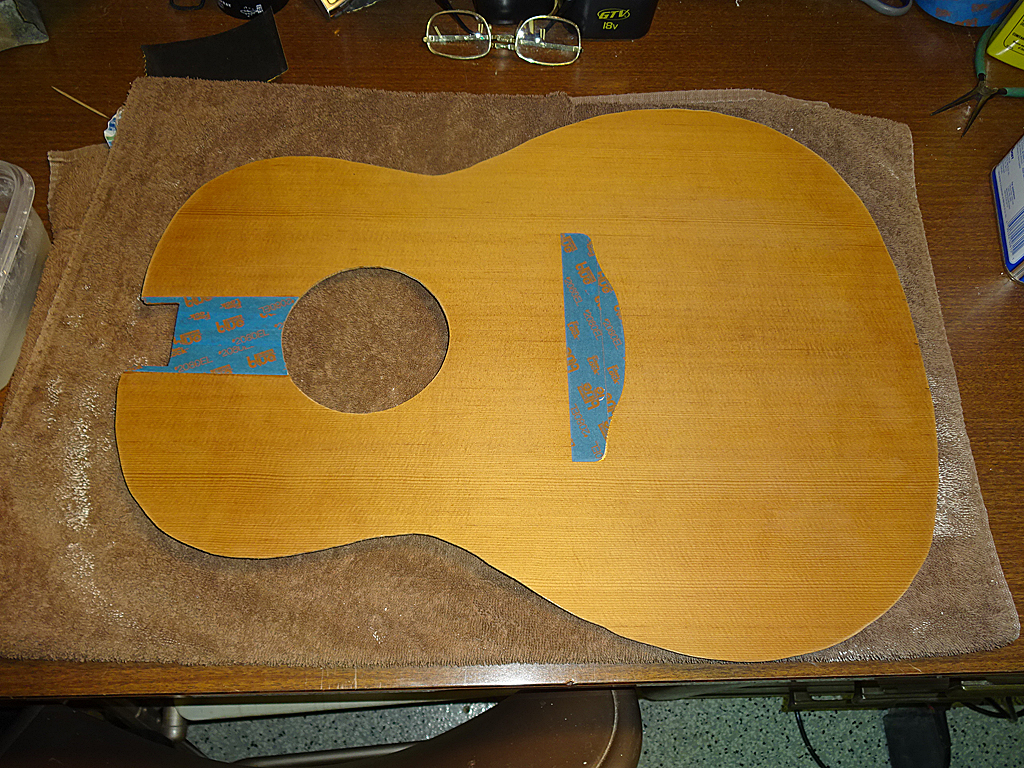
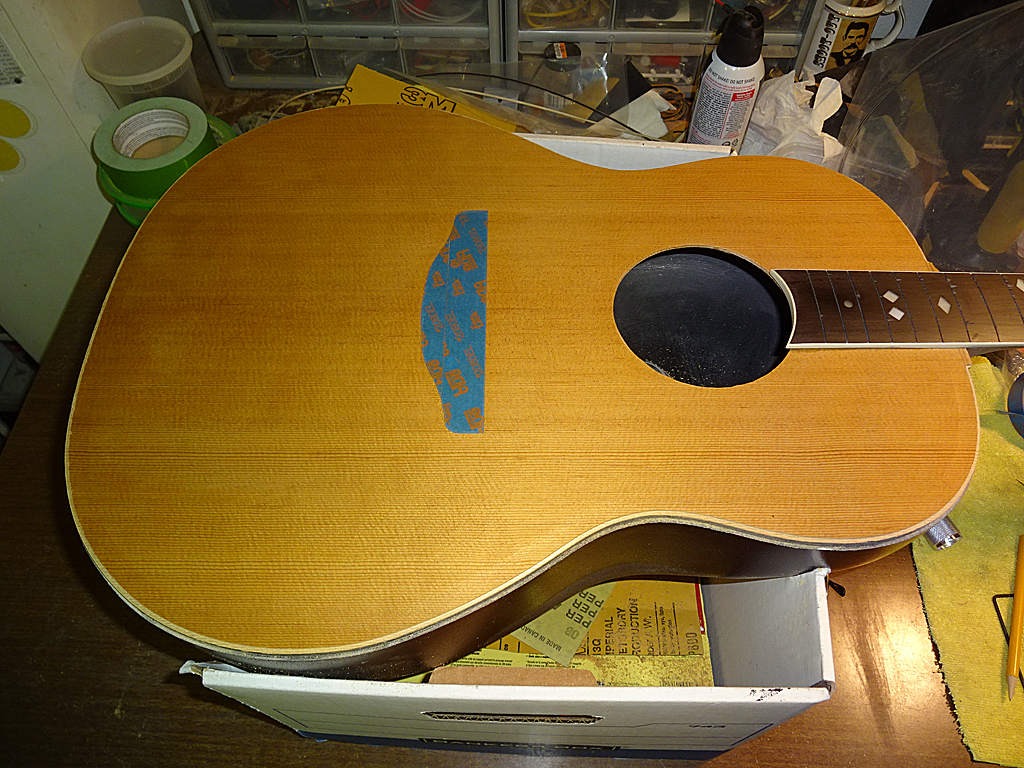
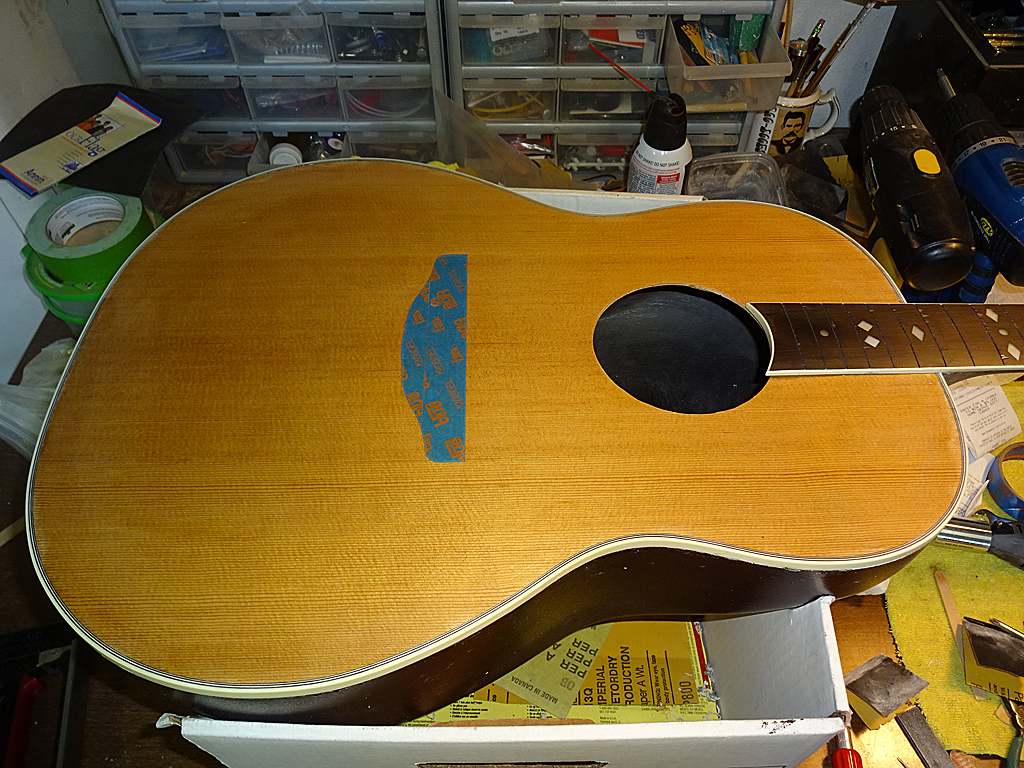
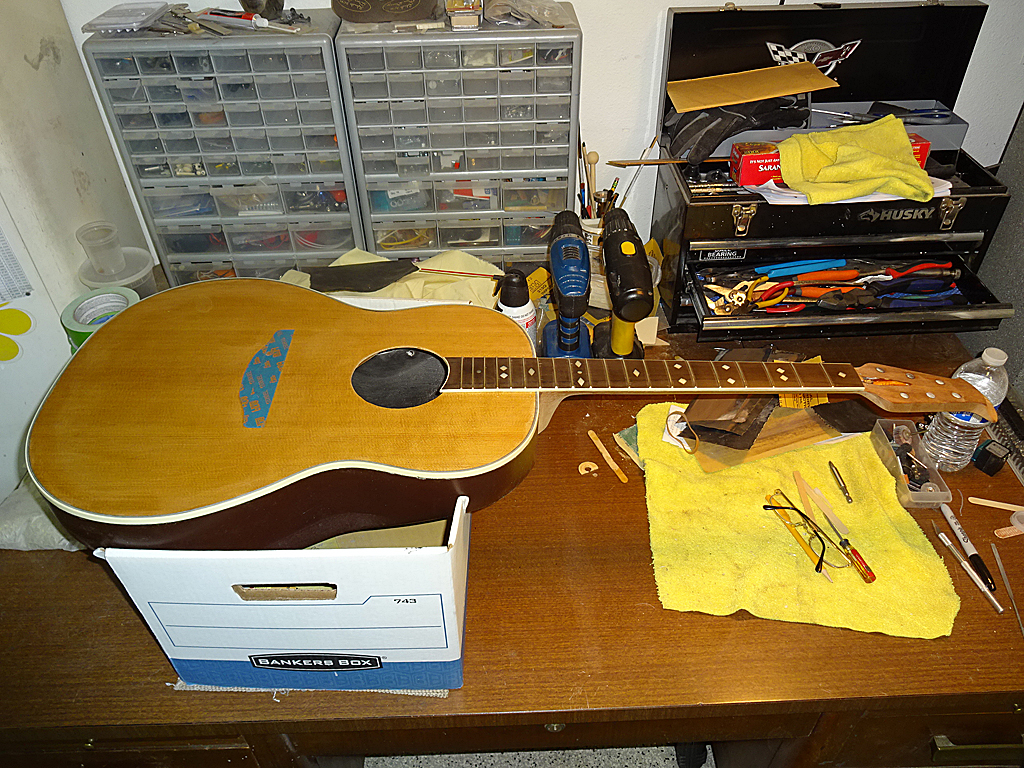
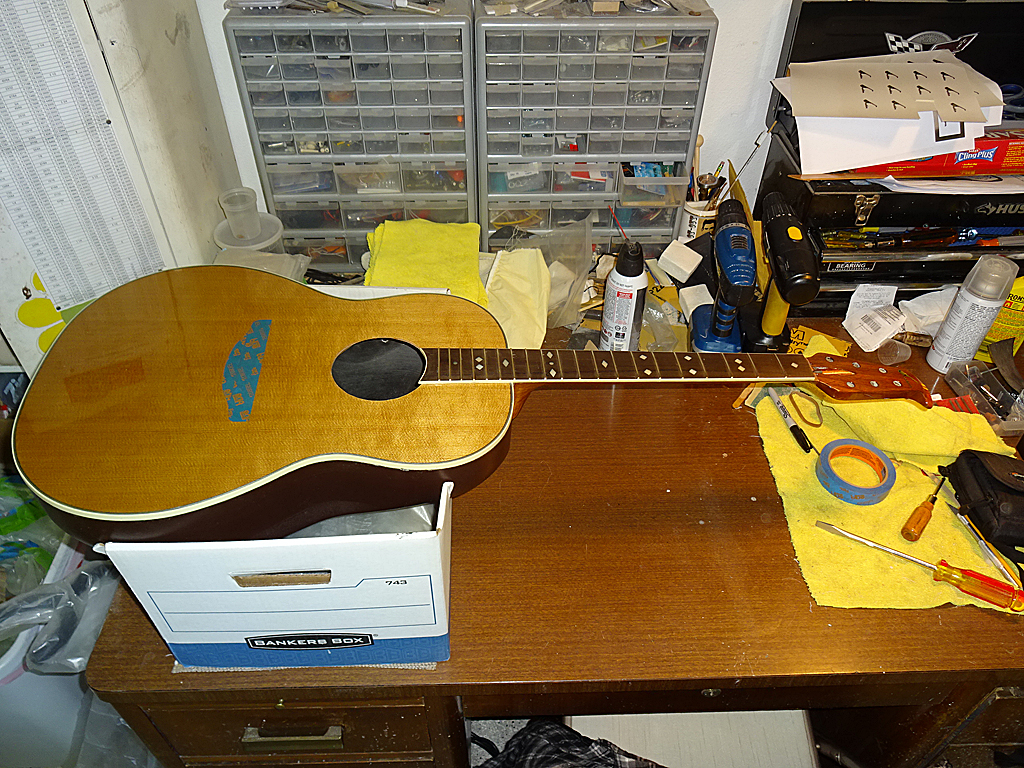
Joined: June 2012 Posts: 2303 Location: Lake Forest, CA | I was away on business so I haven't done anything for the last couple of weeks.
The wood is highly figured. It can't really be called bear-claw. More like bear-gnawed spruce.
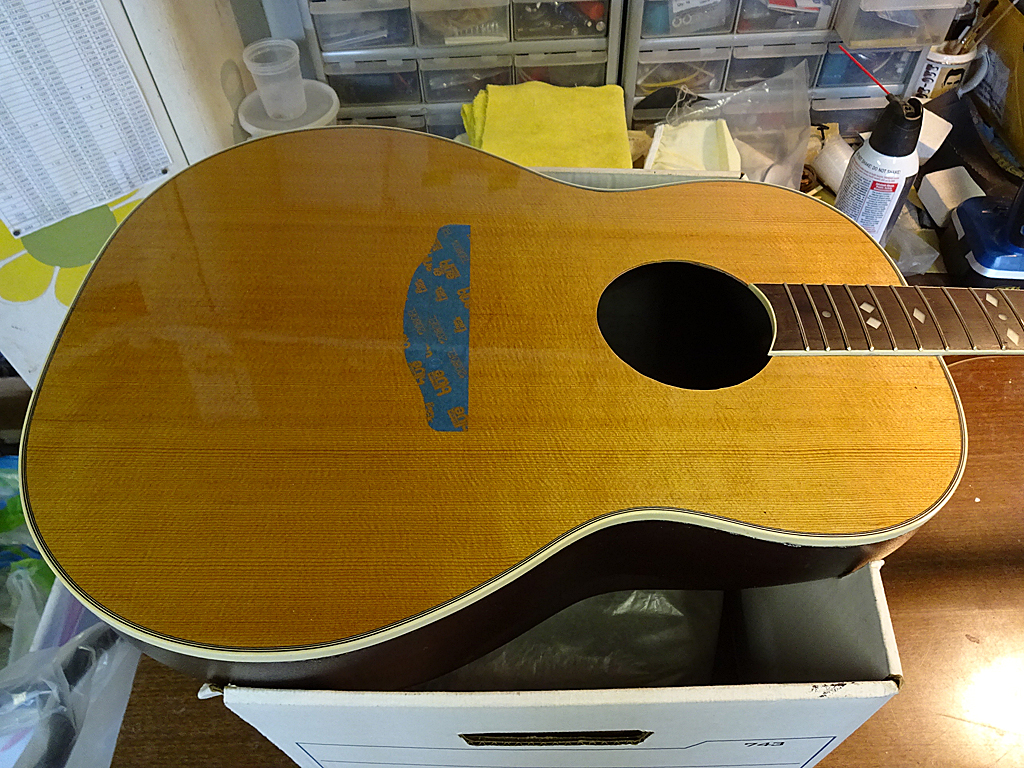
The top has been wet-sanded with 400-grit to level the surface in preparation for the final coat.
| ||
| |||
| Explorer |
| ||
Joined: December 2015 Posts: 41 | I really love the water rippling on that top.... | ||
| |||
| BanjoJ |
| ||
Joined: September 2012 Posts: 809 Location: Thredbo, NSW, Australia | Gorgeous! | ||
| |||
| arumako |
| ||
Joined: October 2012 Posts: 1018 Location: Yokohama, Japan | The sound board is absolutely stunning Dan, can't wait to see the rest of your progress! | ||
| |||
| DanSavage |
| ||
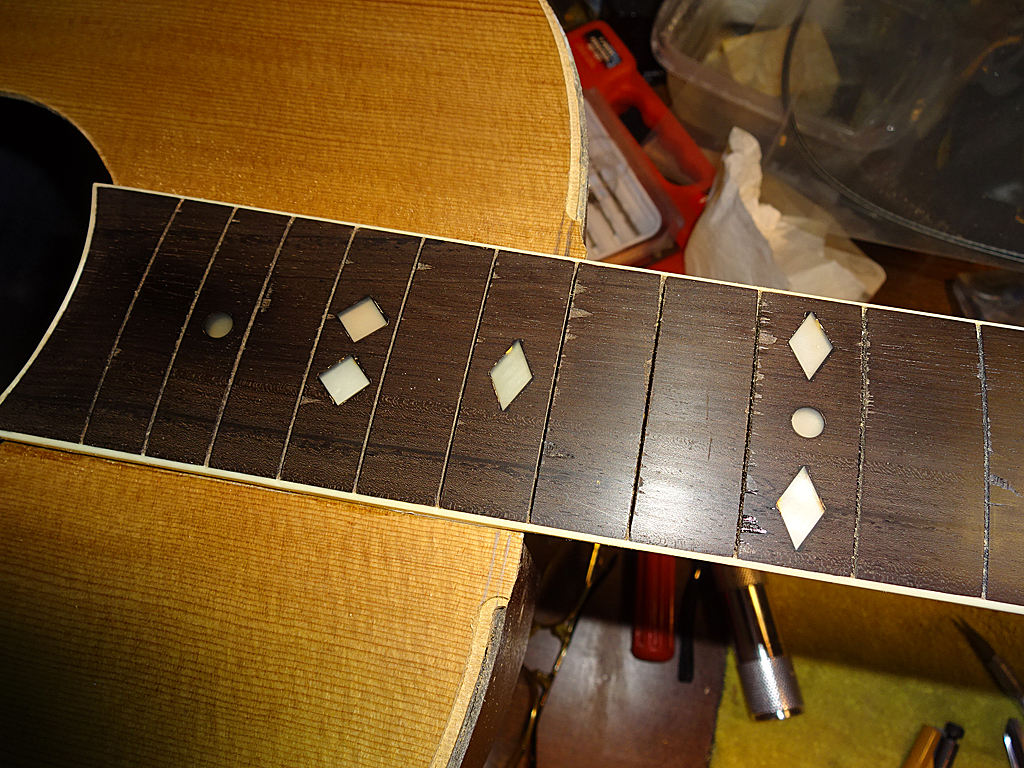
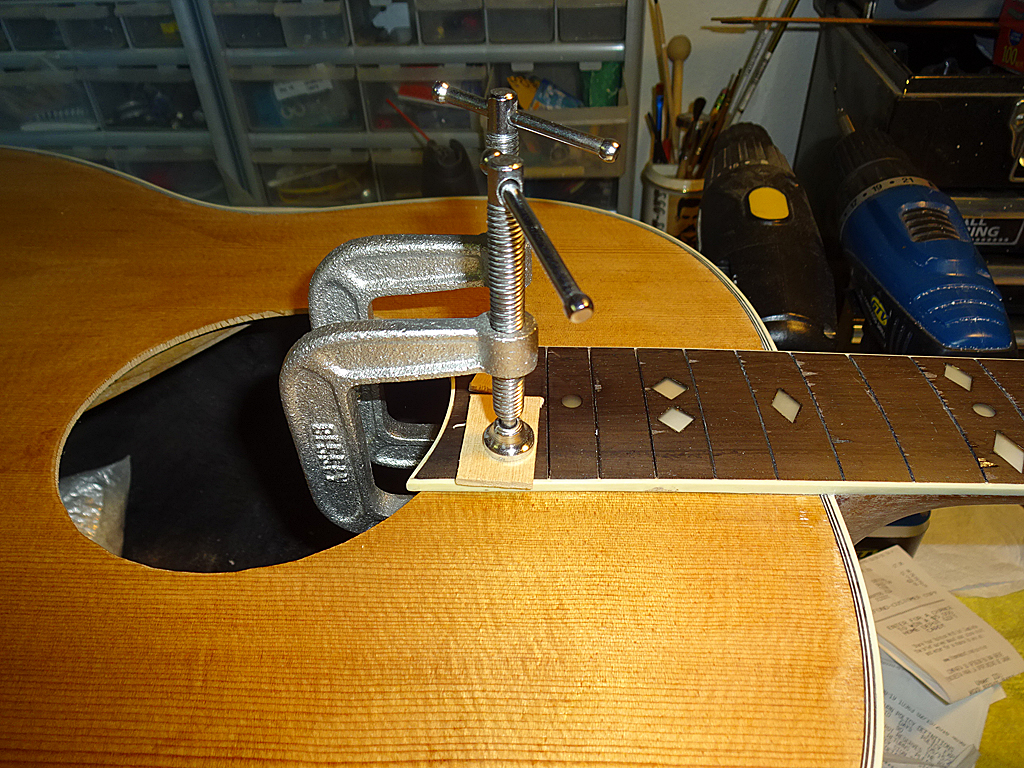
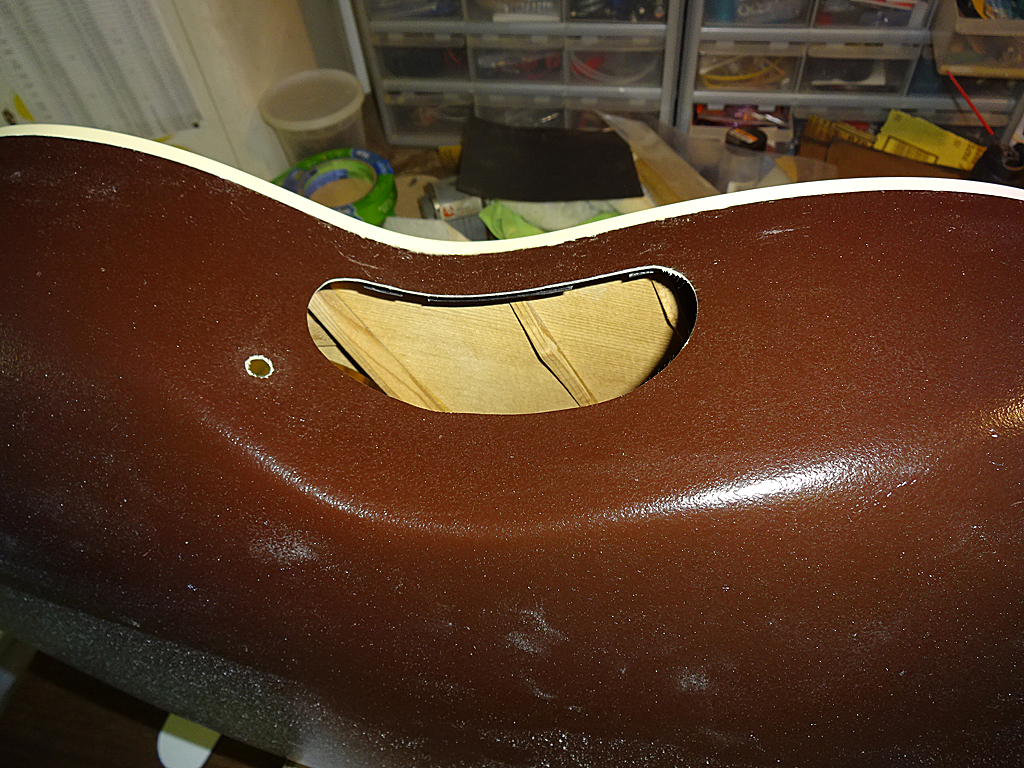
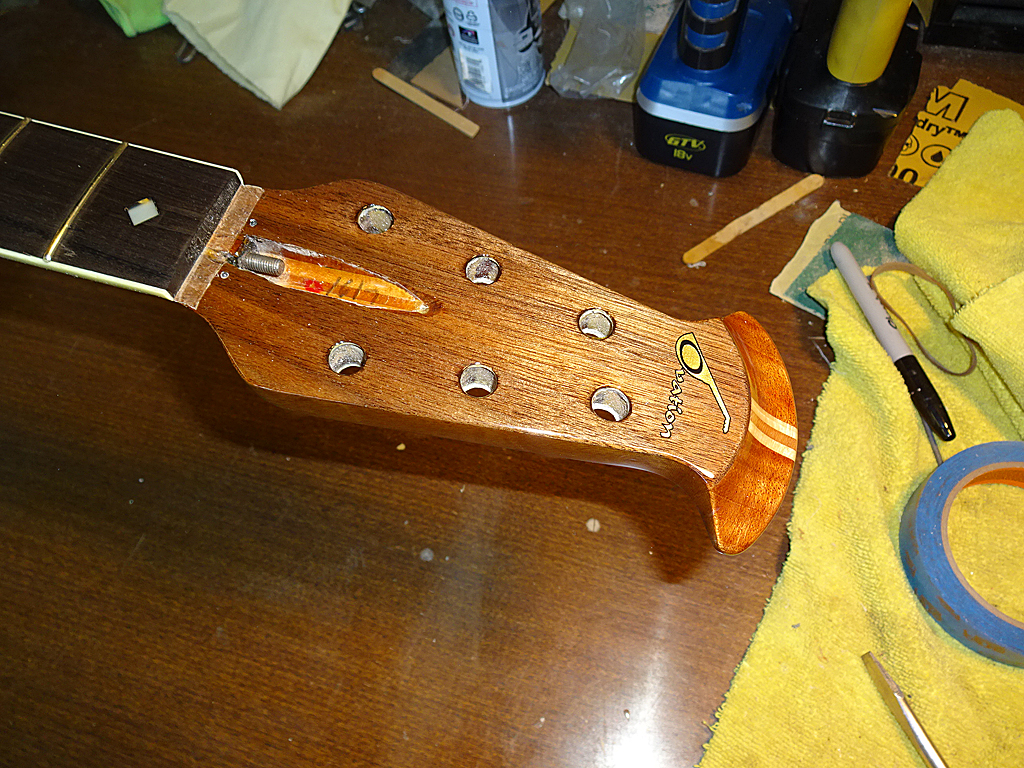
Joined: June 2012 Posts: 2303 Location: Lake Forest, CA | Moving right along. The top is glued to the bowl. Binding/purfling channels have been routed.
The Stewmac fret tang nipper was worth the $65. Next job is to trim the frets even with the sides of the fret board, then bevel, level, crown and polish them. | ||
| |||
| arumako |
| ||
Joined: October 2012 Posts: 1018 Location: Yokohama, Japan | As the Inspector Gadget would say, "Wowsers"! DanSavage. You are awe inspiring! Really precise work. So many things I want to ask... when you do the rough cut of the sound board, how large do you cut it (like Xcm larger than the bowl?). Did you do the "whittling" of the binding channels with a chisel? What kind of adhesive did you use to glue down the fret board (probably didn't use much)? Are the frets EVO Golds? They sure look nice! Oh pester, pester, pester, sorry Dan...inquiring minds want to know...oh and thanks for sharing! | ||
| |||
| DanSavage |
| ||
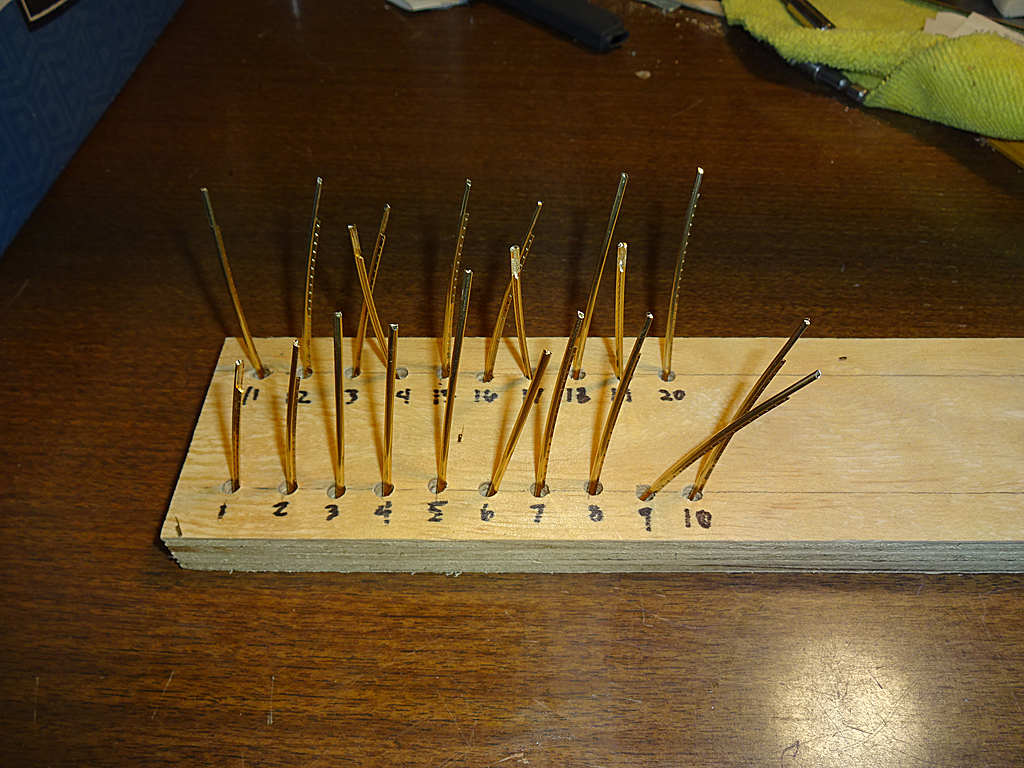
Joined: June 2012 Posts: 2303 Location: Lake Forest, CA | Hi Ken, You're welcome. 1) Not a specific amount. I just make sure it is wider then the sides of the bowl. Once it's glued down, I use a Dremel sanding drum to take off the excess so I can route the channels. 2) Binding channels were whittled with Xacto #11 and Xacto chisel. I use the #11 to score/cut the lines drawn to the necessary depth, then use the chisel to finish the cuts. When routing the channels, I start with the binding channel, then route the purfling. When whittling, I do the opposite; cut the purfling, then the binding. 3) Before gluing the top, I used OBG to coat the underside of the fretboard and the area on the top where the fretboard would be glued. I let both dry, then glued the top. To reactivate the glue, I slid a piece of linen wet with hot water between the two for a minute or so, then clamped the fretboard extension. 4) Yes, they're EVO gold frets. Very hard and springy. IOW, they're of a very high temper, almost like spring steel. arumako - 2016-02-19 9:20 AM As the Inspector Gadget would say, "Wowsers"! DanSavage. You are awe inspiring! Really precise work. So many things I want to ask... when you do the rough cut of the sound board, how large do you cut it (like Xcm larger than the bowl?). Did you do the "whittling" of the binding channels with a chisel? What kind of adhesive did you use to glue down the fret board (probably didn't use much)? Are the frets EVO Golds? They sure look nice! Oh pester, pester, pester, sorry Dan...inquiring minds want to know...oh and thanks for sharing! Edited by DanSavage 2016-02-19 12:01 PM | ||
| |||
| DanSavage |
| ||
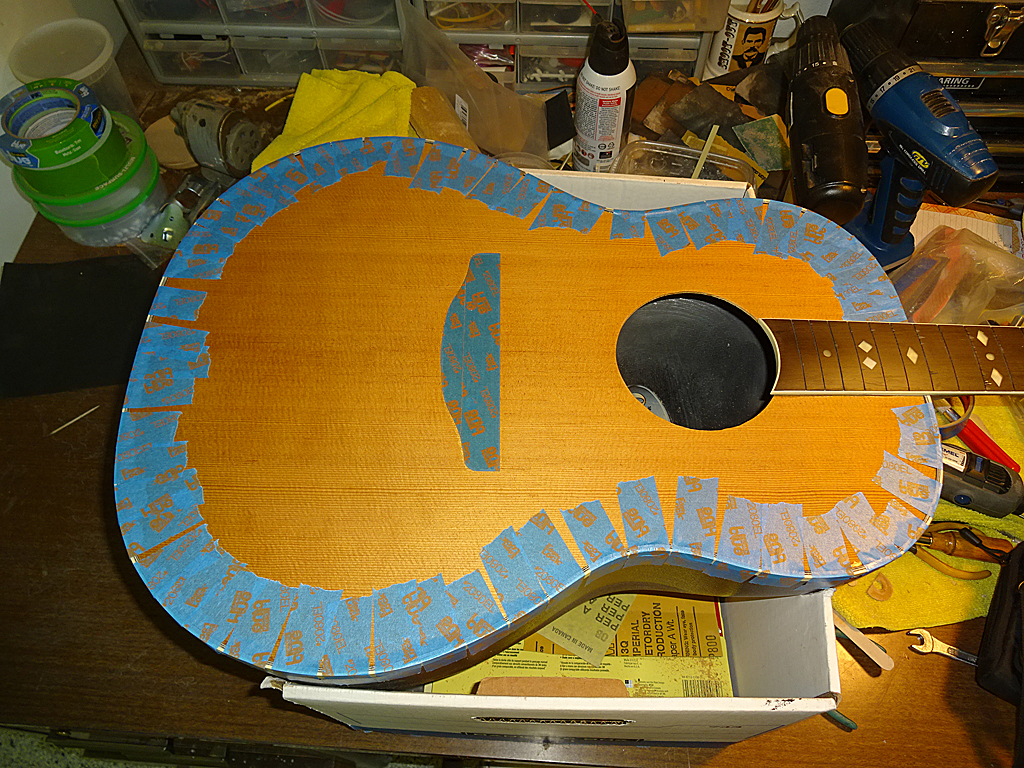
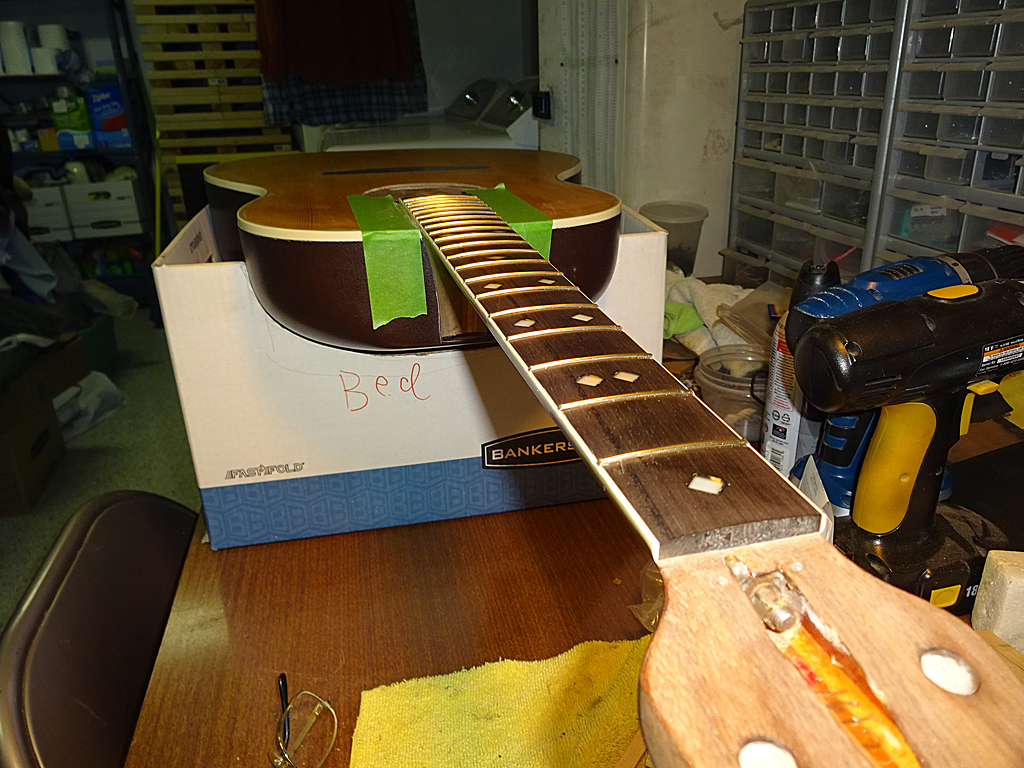
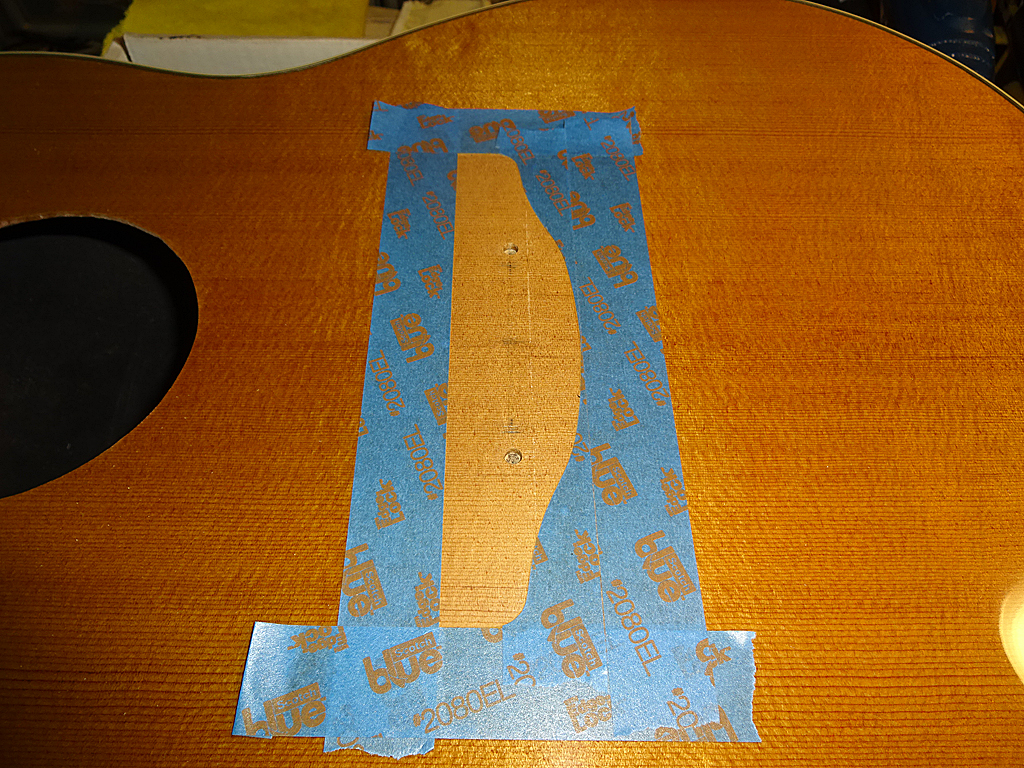
Joined: June 2012 Posts: 2303 Location: Lake Forest, CA | Frets are trimmed, leveled, beveled & crowned. Masking tape on the body is to protect the wood from the files.
| ||
| |||
| moody, p.i. |
| ||
Joined: March 2002 Posts: 15654 Location: SoCal | Did I miss the opportunity to have my Adamas I neck refinished? | ||
| |||
| tpa |
| ||
Joined: December 2004 Posts: 556 Location: Denmark | DanSavage - 2016-03-12 2:02 PM +1 (woo hoo!) Pretty headstock indeed. Besides that it's amazing how clean Your work seems. Most gluing I do end up as a mess with glue all over including my fingers, the workbench etc. etc. | ||
| |||
| arumako |
| ||
Joined: October 2012 Posts: 1018 Location: Yokohama, Japan | WOW! Just WOW...DanSavage. Awesome work as usual. Coloring the hysol is a great idea! A bit surprised at the aggressive choice of adhesive for the bridge. I thought you might go for Hide or OBG. The work on the O decal is done so beautifully...professionally. I'll be following in your foot steps soon, as I'll need an O decal to put on my carbon fiber face plate of my upgraded iDea headstock. When Alain Prost was the F1 World Champion, he was nicknamed "The Professor" because his moves were so precise. That's a nickname befitting for you! I am learning so much from your posts. Can't wait to see the finished product. Thanks so much for sharing! | ||
| |||
| Cavalier |
| ||
Joined: March 2013 Posts: 359 Location: undisclosed | If there is a place to get aggressive with glue it is the bridge. Great work Dan, you do a amazing job of documentation. I get going and don't want to stop, its only been the last couple of years since I got a cell phone which you would think would make it easier..... | ||
| |||
| DanSavage |
| ||
Joined: June 2012 Posts: 2303 Location: Lake Forest, CA | moody, p.i. - 2016-03-12 7:03 PM Did I miss the opportunity to have my Adamas I neck refinished? Nope. As I recall you wanted to take your Adamas neck from gloss to satin, right? Your Adamas has the cauliflower headstock, right? I'm not keen on refinishing the front of the headstock, but I'm open to doing the back of your neck to make it more playable for you. I checked with Eastwood, but they don't make a satin 2K urethane. So, we're stuck with doing one of two things: 1) Sand the back of neck to reduce the gloss to a satin finish. 2) Spray satin polyurethane. Keep in mind that to do the second choice will require doing the first. Using a sandpaper with a very fine grit will probably give you the satin finish you desire. | ||
| |||
| DanSavage |
| ||
Joined: June 2012 Posts: 2303 Location: Lake Forest, CA | tpa - 2016-03-13 4:36 AM DanSavage - 2016-03-12 2:02 PM +1 (woo hoo!) Pretty headstock indeed. Besides that it's amazing how clean Your work seems. Most gluing I do end up as a mess with glue all over including my fingers, the workbench etc. etc. When I was building model airplanes, I got glue everywhere, too. More at the beginning than the end, but still. Working on guitars has caused me to get more careful with the gluing. :D | ||
| |||
| DanSavage |
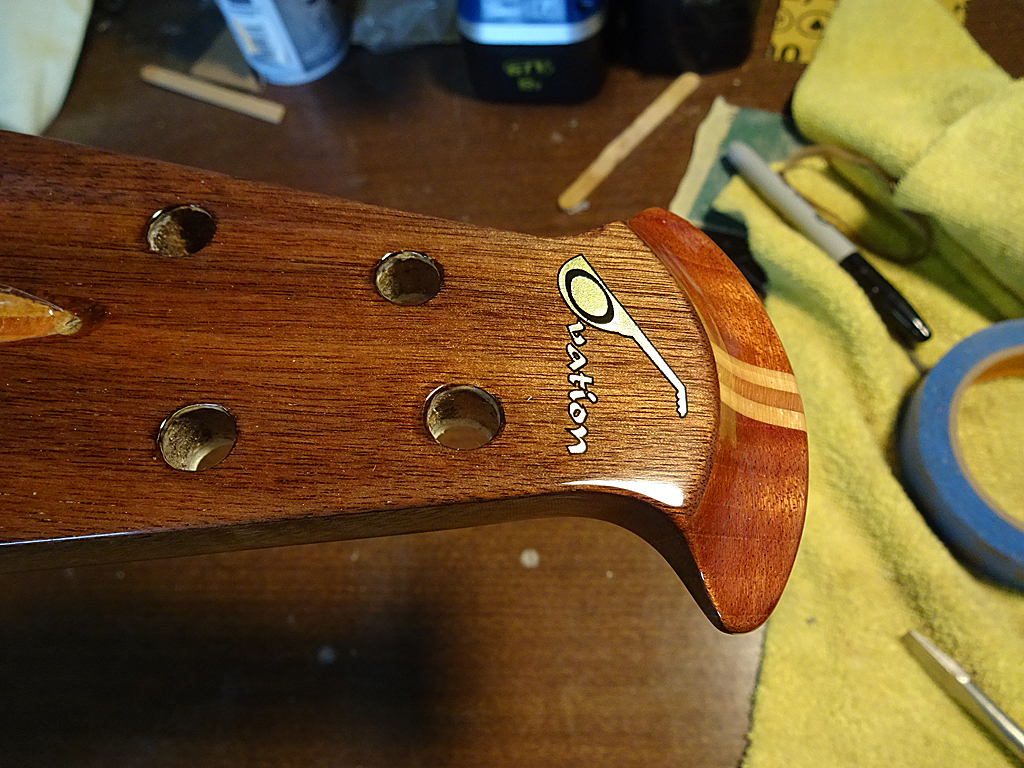
| ||
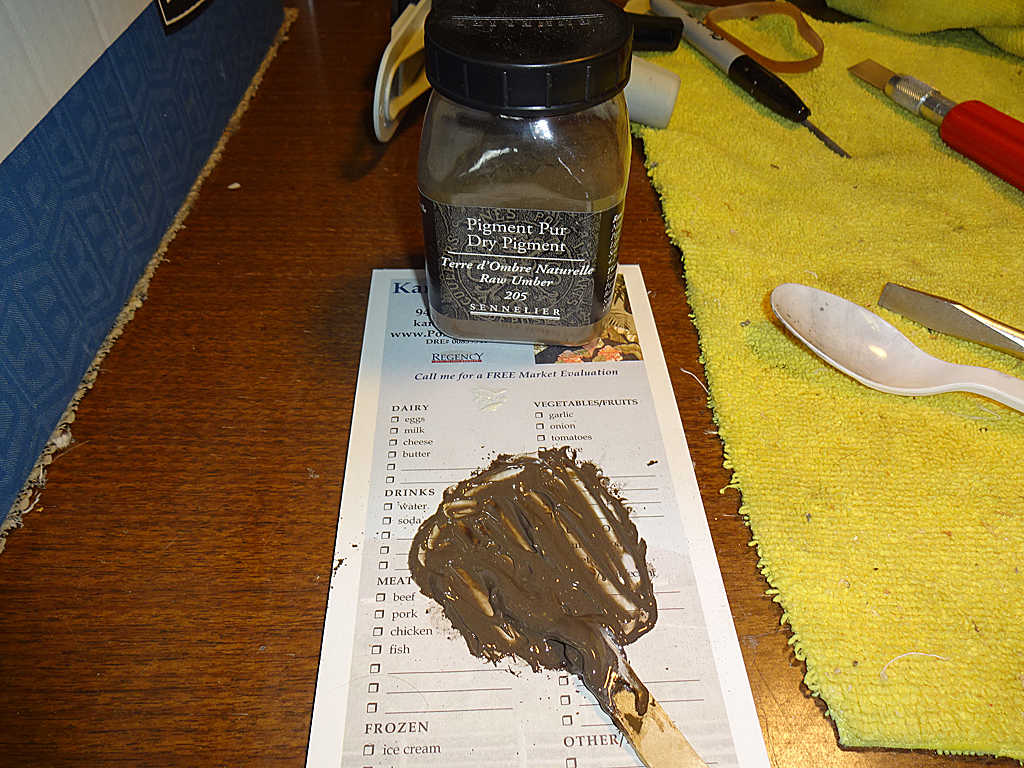
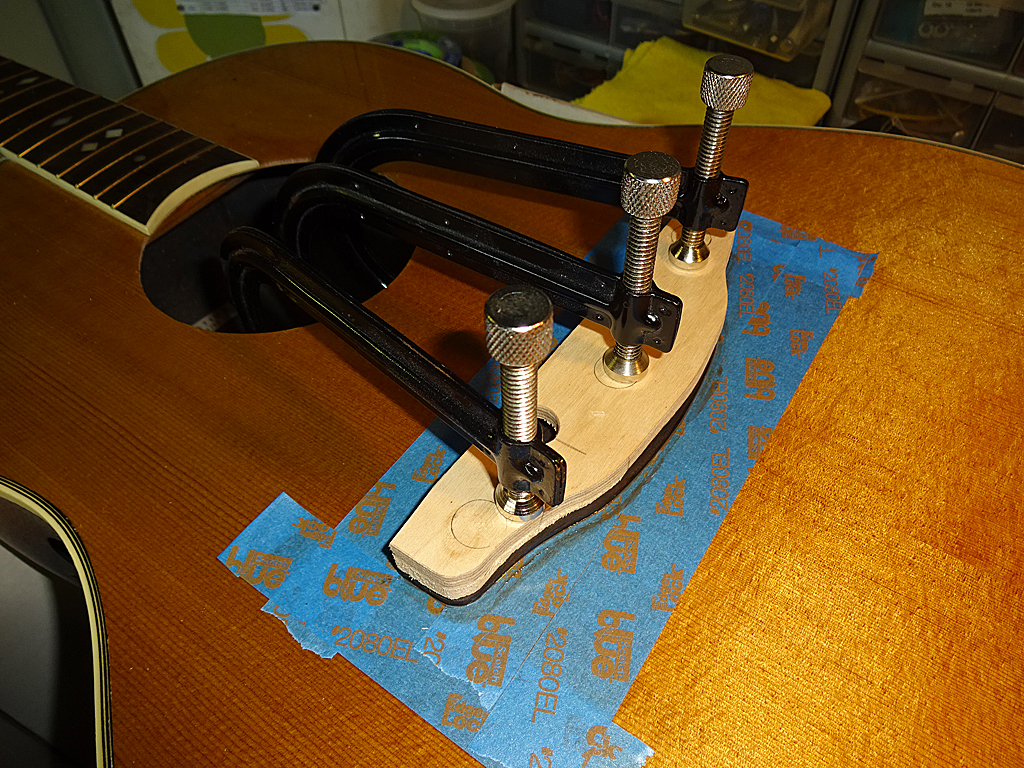
Joined: June 2012 Posts: 2303 Location: Lake Forest, CA | Thanks, Ken. I've been coloring epoxy for years. Pigment is sold in gel form, but there's no guarantee that the gel will be compatible with epoxy. So, I started using dry pigment so I didn't have to worry. Plus, dry artist pigment can be mixed to get whatever color you need. I did consider using HHG for this bridge, but the point of this guitar was to build it as closely to my 1619 as possible to limit the variables so I could more directly compare the differences between a torrefied top and a non-torrefied top. Both guitars are about the same vintage, with the same method of bowl construction. I built both tops using the same brace pattern and the same types of glue for gluing down the braces. The bridge on my 1619 was originally glued down with HHG, but I did a poor job of prepping the top and it popped off after about a month. So, I reglued it with Hysol as I knew that wouldn't result in a failed glue joint. (it hasn't) So, to eliminate the bridge glue as a variable, I used the same glue on this 1617 as the 1619. Even so, the bridge on the 1619 was walnut and this one is ebony, but I figured the differences between the two would be minimal. That's also why I decided to pop for the cost of electronics, including the piezo bridge saddle. If I had gone with my original plan of using a bone saddle, I would not be able to be sure that the difference in sound was due to the torrefied top or the bone saddle. I'm really glad I spent the dough to buy my Alps printer. It's one of the few ever produced that's able to print opaque colors, like gold foil. Although I used a different method to print the decals on Jay's guitar, the Ovation logo on the later guitars used gold foil outlined in black, and it would have been impossible to print that later logo using the method I used on Jay's O. arumako - 2016-03-13 5:14 AM WOW! Just WOW...DanSavage. Awesome work as usual. Coloring the hysol is a great idea! A bit surprised at the aggressive choice of adhesive for the bridge. I thought you might go for Hide or OBG. The work on the O decal is done so beautifully...professionally. I'll be following in your foot steps soon, as I'll need an O decal to put on my carbon fiber face plate of my upgraded iDea headstock. When Alain Prost was the F1 World Champion, he was nicknamed "The Professor" because his moves were so precise. That's a nickname befitting for you! I am learning so much from your posts. Can't wait to see the finished product. Thanks so much for sharing! | ||
| |||
| DanSavage |
| ||
Joined: June 2012 Posts: 2303 Location: Lake Forest, CA | Cavalier - 2016-03-13 10:51 AM If there is a place to get aggressive with glue it is the bridge. Great work Dan, you do a amazing job of documentation. I get going and don't want to stop, its only been the last couple of years since I got a cell phone which you would think would make it easier..... Thanks, Chris. This level of documentation comes from years of building model airplanes. Those guys want to see every detail of a build. (LOL!) | ||
| |||


| Jump to page : 1 2 3 4 5 Now viewing page 3 [25 messages per page] |
| Search this forum Printer friendly version E-mail a link to this thread |
| This message board and website is not sponsored or affiliated with Ovation® Guitars in any way. | |
| (Delete all cookies set by this site) | |